


Tubeless tyres have made big inroads into the world of cycling. They are virtually the norm in mountain biking, improving in leaps and bounds for road cycling, and for gravel cyclist types, a lot of us are forgoing the tubes and riding with spooge (aka sealant) in our tyres. Orange Seal, undoubtedly our favorite sealant.
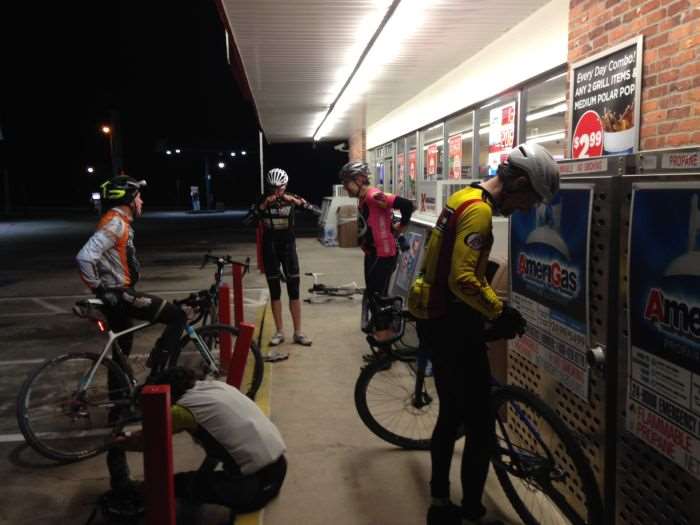
Nothing in life is infallible, and that includes tubeless tyres and the chance of scoring an unlucky puncture. This year’s Dirty Kanza 200, like every other before it, was a hot bed of flat tyres, even if you were riding tubeless tyres. After a while, I stopped counting the number of riders I spotted by the roadside, fixing a flat. Meanwhile, I prayed to the flat gods for 206 miles, hoping I wouldn’t succumb to the same fate… no jinxing me please.
Should you puncture a tubeless tyre in the field, during a ride or race, standard practice is to remove the tubeless valve, install a tube and get riding again. Seemingly, if the tyre was punctured, it can no longer function as a true tubeless tyre and thus, spends a life relegated to getting up close and personal with a tube rubbing against its belly.
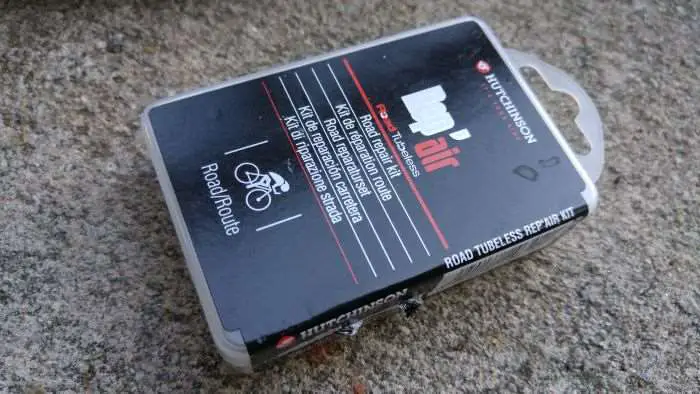
But alas, all is not lost! Hutchinson, a well known tyre manufacturer, produces the “Rep’air” kit. Simply put, the Rep’air kit resembles a patch kit, like the kind you would patch a regular tube with. You may be scratching your head and thinking – but, can’t you use a regular patch kit? Possibly, but it’s not something I’ve tried, and the glue in those patch kits typically isn’t pliable enough to deal with a tubeless tyre.
There are two versions of the kit available, Road and Mountain. I chose the Road kit, because I have a mix of road tubeless and gravel tubeless tyres in my collection. In hindsight, I should have chosen the Mountain kit, because the patches are a little bigger, and therefore, could patch a potentially bigger hole.
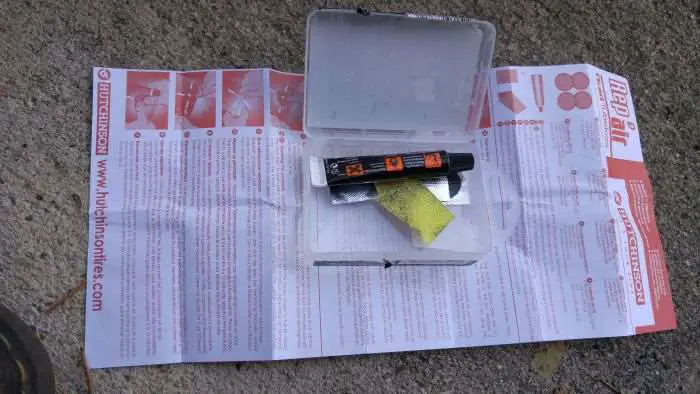
Included with the kit is a five gram tube of glue, four patches and a small piece of sandpaper (or emery paper, if you prefer). Priced anywhere from $US 9.00 to $US 12.00, that seems expensive for what appears to be an ordinary, garden variety patch kit. However, Hutchinson claims their branded glue is a special type of super glue, which remains flexible, but without drying out the rubber it is adhering to. For anyone who has tried using superglue as a patch adhesive, it makes the rubber beneath the patch very brittle.
Patch Installation
Hutchinson recommends you remove the punctured tyre from the wheel before beginning the work of patching. Definitely makes life a lot easier. With the tyre removed, clean the inside of the tyre in the compromised area, using the provided sandpaper.
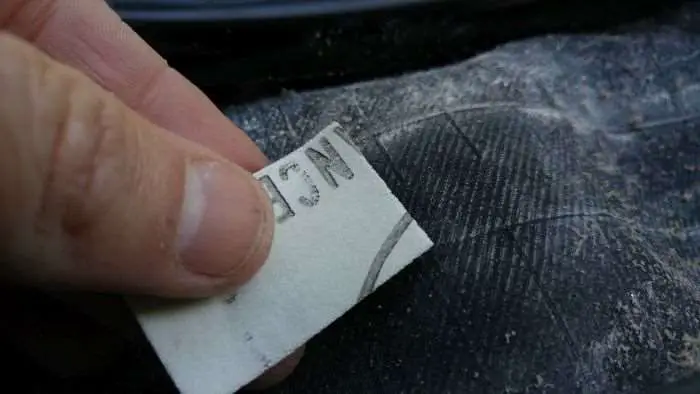
On my punctured sample tyre, some dry sealant was present, but the area around the cut cleaned up quite well.
The following steps are just like any other patch kit.
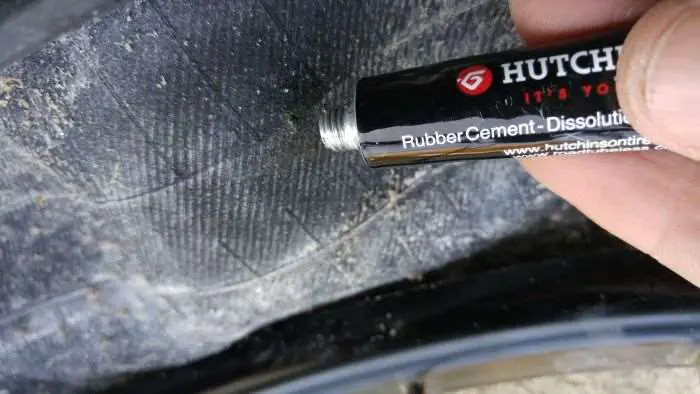
Apply the glue and wait until it is perfectly dry to the touch. This will take anywhere from five to 10 minutes, depending on environmental temperature.

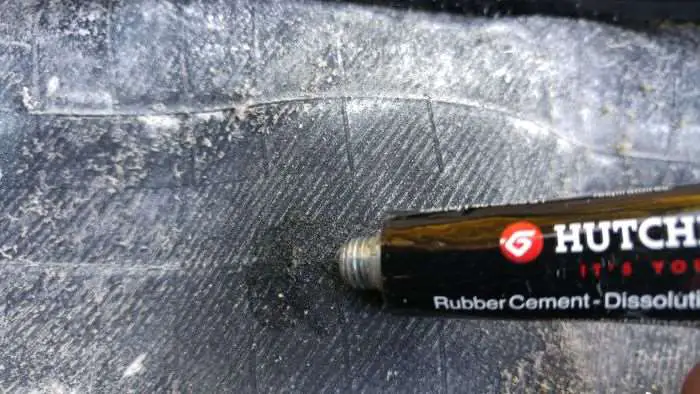
Pictured above, the offending tyre casing hole with dried glue, ready for the patch. It looks diminutive from this viewpoint, but when the tyre is inflated to optimal pressure, the tyre spreads out and the hole expands. Lovely. The sealant would seal the hole for a short while but ultimately, kept ejecting the floaty coagulant particles (mostly spurting over my seat tube) and the seal was lost. Bollocks.
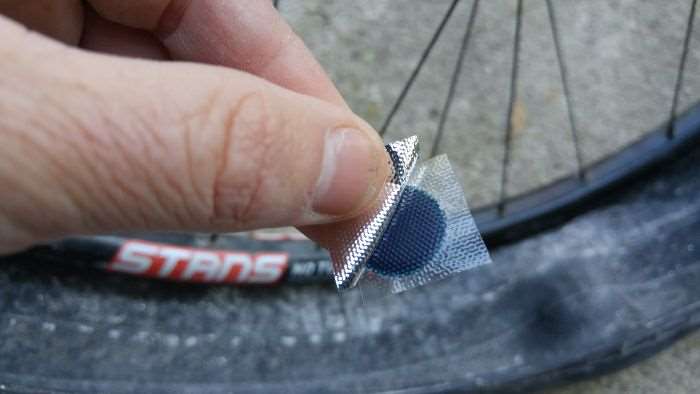
Prepare the patch for adhesion by rolling back the foil.
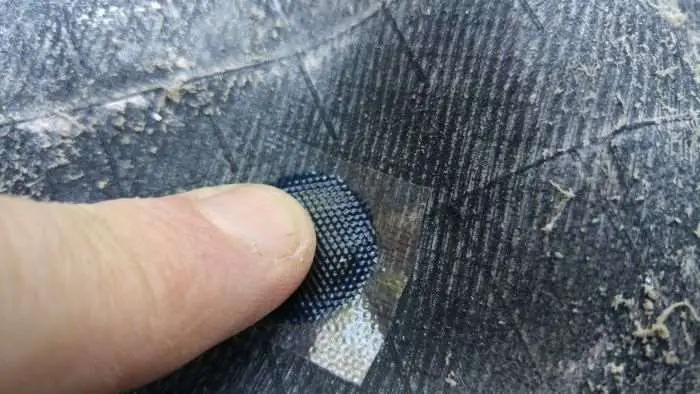
Position the patch, and firmly push down with your fingers / thumb once it is situated correctly. Be sure to work out any air bubbles from the center towards the outside.
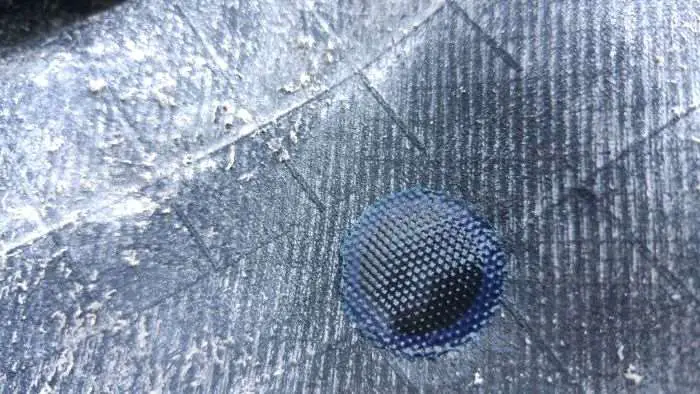
Done! Admire your handiwork!
Next, mount the tyre sans sealant and inflate. The repaired tyre, a Hutchinson 650b x 2.0″ Black Mamba, was inflated to 40psi (far too firm for riding), but I wanted to ascertain if the tyre would hold air for at least 24 hours.
The good news – the patch worked and almost no pressure was lost. I say almost, because not every tubeless tyre mounted sans sealant will hold air overnight. The good news continued. Filled the tyre with sealant and rode for two to three hours – the tyre held pressure. Superb, tyre patched!
The Hutchinson Rep’Air tubeless patch kits seem to work best in mountain and gravel bike applications, where the tyre pressures are lower. I’ve had moderate success with patching road tubeless tyres, but that is mostly dependent on the size or position of the offending hole. With that said, I’ve patched two tubeless road tyres. The first tyre repair was prefect. However, the second example was a fail. Inflated to 80psi, the patch forced a tyre bubble to appear on the tread above the patch. Clearly the hole was in a bad place, and the patch wasn’t stiff / resilient enough to resist changing its shape. Thus, the tyre in the second example was destined for the recycle bin 🙁
Summary
The asking price of $US 9.00 to $US 12.00 for Hutchinson Rep’Air is cheap when you compare the cost of replacing a tubeless tyre, especially one that has plenty of life remaining.
Every Gravel Cyclist – or any cyclist for that matter – who uses tubeless technology, should consider adding a Hutchinson Rep’Air kit to their home workshop. And, the repair kit works on other tyre brands too, not just Hutchinson.
| Hutchinson Rep’Air Kit |
| Click the Link to BUY from Amazon |
Doesn’t look like fun. I’ve seen a device that uses plugs to fix a tubeless tire from the outside. Similar to the way auto tires are repaired .Something like this: https://smile.amazon.com/Dynaplug-CARBON-ULTRALITE-Bicycle-Puncture/dp/B017BYKGTC/ref=sr_1_8?ie=UTF8&qid=1498854516&sr=8-8&keywords=tubeless+bicycle+repair+kit . I’ve never tried it — and it isn’t cheap. Anyone out there try this method?
One of my friends has tried that product, or something similar, and reported mixed success.
I’ve used ordinary glued tube patches and self adhesive patches on tubeless tires. But, I wouldn’t do it during an event. Not with wet sticky sealant all over. And I don’t bring extra sealant along. I’ve tried plugs, too, but they weren’t reliable for long. Put in a tube get back on the road.
Plugs work fantastic. In many years of tubeless (MTB, road) they have sealed any flat for me that was too large for sealant (and not a huge tear). Not having to take the wheel (or tire) off is fantastic.
I have also used these Hutchinson patches on tires that I didn’t plug trailside. They worked fine for me, but you have to clean and dry out the inside of the tire, so they aren’t a good trailside option. And then I discovered that regular patches worked just as well in practice and cost a whole lot less
Good feedback, thank you Hans.
Thanks everyone for sharing your experience. I’m a real newbie on all of this tubeless stuff. Coming from a life long (almost 60 years of road racing and riding), I found everything about tubeless tech. a bit intimidating. What I’ve learned after a full year of tubeless gravel riding is that it’s really not a big deal. The articles and reviews on this website of course, have been the most useful source of info. and encouragement to this old timer’
Ditto, sorta. After years of resisting tubeless, due in part to this patching question, I am about to make the conversion on my gravel bike. I have no intention of patching a tubeless tire on the side of the road and would just use a tube. As someone who is fond of booting a regular clincher with a cut, I’m not about to toss a tire with a hole in it. Are there other viable options for fixing a tire back home, like sewing or car tire patches?
Tom, the Genuine Innovations tubeless repair plugs are much faster than putting in a tube. It is at least worth carrying them (since they’re also tiny) and giving it a try. You can always fall back to using a tube, but in my experience these seal the tire (assuming you also have sealant of course) and take less than a minute to get out of the saddle pack and seal the hole.
https://goo.gl/photos/iZJDEnfrJjUvWT838
https://www.genuineinnovations.com/us/products/tools-accessories/tubeless-repair-kit.php
For when you are back at home and can take off the tire, you can also use car tire plugs like this:
https://goo.gl/photos/5NN9psmPJ2mWDNa66ig
Again, assuming you are also using sealant like Stans or whatever, I have had those work great — I just pull them through from the inside and clip off the “tail”. I don’t bother using adhesive or anything; basically you just need something to fill the space that is too large for the microbeads in the sealant to fill.
For small punctures, the sealant itself will of course fix those without any intervention. I’ve been using tubeless on my road bike for a few years now, with Schwalbe Pro One 28mm on my commuter. I have had a half dozen punctures which have just sealed with sealant; on the offroad bikes I’ve had a few punctures that sealant couldn’t seal, but the plugs worked excellent. I think there has been only one time I had to put in a tube in the past 3 years and that was because I didn’t have any plugs in my saddle bag — and I was riding with others and didn’t want to fuss around with getting a tire to re-seal on the road, etc.
Note that I did start my road tubeless adventure with Hutchinson Intensive (“25mm” ) and Fusion 3 (23mm) tires, but I found both of those to be terrible tires. The Intensives rode horribly and the Fusions flatted far more than tubed tires and had terrible durability. Schwalbe tubeless has been a fantastic experience, though. And their G-One Allround gravel tires are second to none in my opinion; I haven’t found anything that rolls faster, even at quite lower pressures (I run the 40mm now to be a little gentler to my rims).
Thanks, Hans! That’s very helpful. Looks just like a tiny little tire plug kit for a car tire. I’ll pick one up. I just bought a set of Stan’s Iron Cross wheels from a buddy. They will mostly be used for gravel and cross, but I would like to occasionally run them on the road in a group ride with road tires because they are so light (1,400g) and my Ti bike is so plush and also maybe in Rouge Roubaix, which is mostly “paved.” The wheels have a tubeless max pressure limit of 45 psi with 32mm tire, and the manufacturer tells me the max with a tube is 50 psi. Translation: They’re light cause they’re flimsy. Do you or anyone else know of a good tubeless road-type tire around 30mm which can be run as low as 45-50 psi? Obviously, my Conti 4 Season 28s, which I love, ain’t gonna work on these wheels. Thanks.
Tom, I agree those are probably not great rims for road tubeless (higher pressure), but hopefully you can find something that will feel nice and ride fast. I would recommend considering the Specialized Roubaix Pro 2BR in “30/32” size; I think you could get away running that at 45psi, though that is probably the lower end of what I’d consider a good pressure for myself (180lbs) on that size tire for road use. It is a decent tire. I have even ridden my 28mm Pro On tires below 50psi –when they lost some air before sealant kicked in and I didn’t want to stop to patch them, but I probably wouldn’t run them below 60psi deliberately.
Another option might be something like the Compass tires in a larger casing (35-38mm) run tubeless. Those have a reputation for being fast rolling, but maybe not the most durable. And honestly the Schwalbe G-One Allround 35mm is a pretty fast tire on pavement too.
I am currently riding a set of 30mm G-One Speed tires. I am running them around 50 psi on pavement. They are fast and light, but also a bit pricey and not exactly the revelation I was hoping. (Probably they are great for the Roubaix-type races?). That might work too. You can certainly run them lower pressure, but at some point you risk damaging those rims if you do have potholes, etc.
Schwalbe tires are generally cheapest to import from Europe (e.g. merlincycles.com)
Hans – thanks for the info. I’ve been running Compass 35mm Bon Jon’s on my Ritchie Swiss Cross with Challenge Latex Tubes. I ride on mixed surfaces in rural NH and have also done fast group rides on pavement on Hilton Head Island SC in the winter. I always run them 40/35 PSI. They have performed outstandingly well for me regardless of the surface. I have the light casing version of the tires. I have about 2000 miles on them. The side walls are beginning to show some flex wear; but they are still going strong on the muddy dirt and gravel roads in my area. Although Compass rates the Bon Jon’s tubeless ready, I have had difficulty getting the somewhat worn tires to seat tubeless. I can’t recommend a tubeless set up. OTOH, they run fantastically well (like a tubular!) with the Challenge latex tubes. So why bother?
Bobk, that’s great to hear. I think I am gonna get some high-volume Compass tires next to run tubeless. I have heard mixed things about the durability/flat-resistance of.Cooass tires, but after a couple rides on Horizon 47mm tires, I think a 700c 38-44mm supple tire would be nice. And I figure with tubeless there would be some better flat protection.
I agree in general that ride of a nice road tire with latex tubes feels as good as tubeless. But with tubeless I have all but eliminated flats which has been really wonderful.
Schwalbe G-One Speed Special One https://www.schwalbetires.com/bike_tires/racing_tires/G-ONE_Speed
Been running these all spring and into the summer. Great tubeless road tire at 30mm I have ridden in the 40 psi range with them. 80 psi max pressure which is plenty with this tire. Tight beed that stays on the rim. I’ve been running them on Hed Ardennes Plus wheels.
Yeah, I am using those G-One Speed tires now too; they do work great for mixed surface, but I think a max pressure of 45psi on those rims makes those less than ideal. For pure gravel 40psi might be ok, but I am much more comfortable running them at 55-60 psi for mixed surface.
Dynaplug works fantastic for plugging tubeless gravel tires. I found a nail that went through the tire tread and out the sidewall yesterday. Two dynaplugs later and the tire held air for the ride home. A day later and there hasn’t been any loss of air. I carry the micro dynaplug kit in my saddle bag. It’s smaller than a CO2 cartridge.