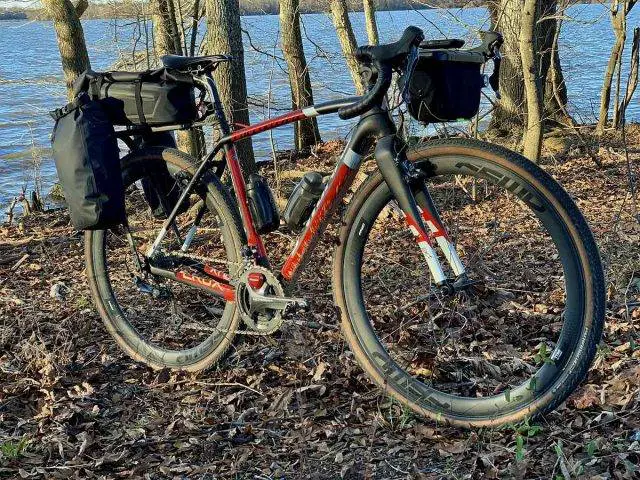
The first thing that comes to my mind when thinking of bikepacking, is a bike loaded to the brim with bags and gear all over the place for a self-supported journey across a long distance. This is bikepacking, but it is only one type of bikepacking. Bikepacking can consist of an overnight trip with staying in a hotel or at a friend’s place. If one is traveling in urban areas, there might not be a need to carry a vast amount of food and water or gear. Bikepacking can also be lightweight minimalist traveling and Tailfin gives you various mounting styles and bag options to satisfy all your bikepacking needs.
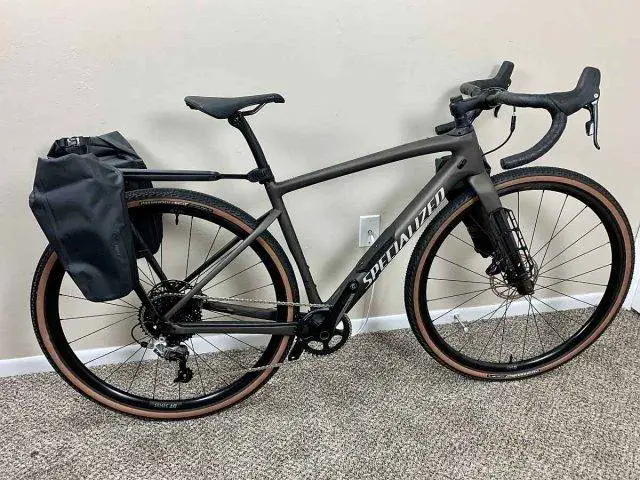
I will be using a Tailfin Carbon Rack with Pannier mounts, but I will not be reviewing it specifically. For a full review and video of both Carbon Rack styles check out JOM’s Tailfin Cycling Carbon Rack Reviews: Trunk & Pannier.
The items in this review provided by Tailfin are:
Axles:
- Universal Axle
- Quick Release (QR) Axle
Extended Alloy Top Stay
Top and Side Bags:
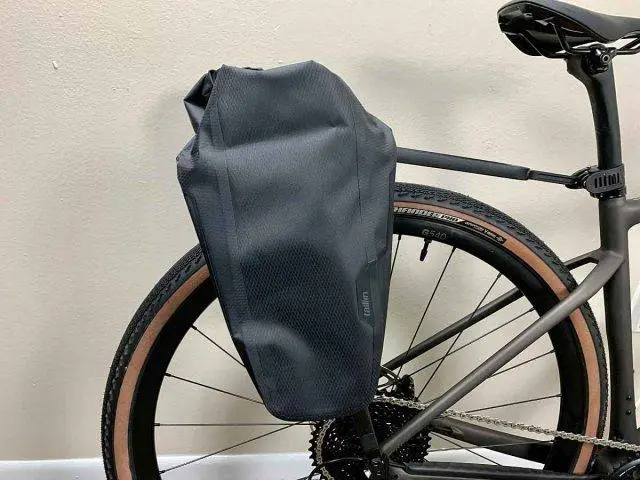
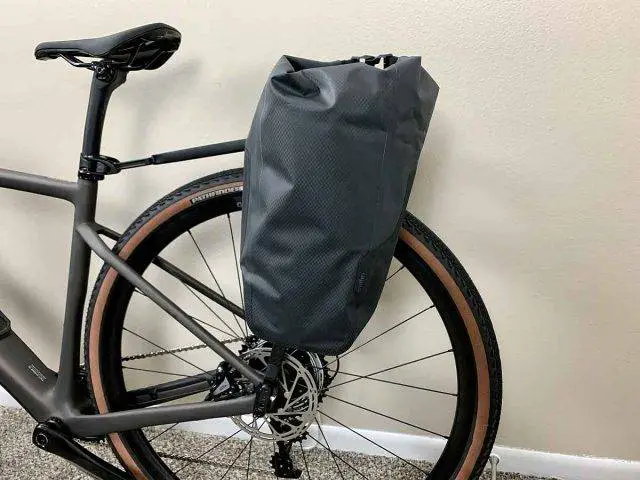
- Mini Pannier 10L
- Mini Pannier 5L
- AP20 Trunk Top Bag
Cargo Cage System:
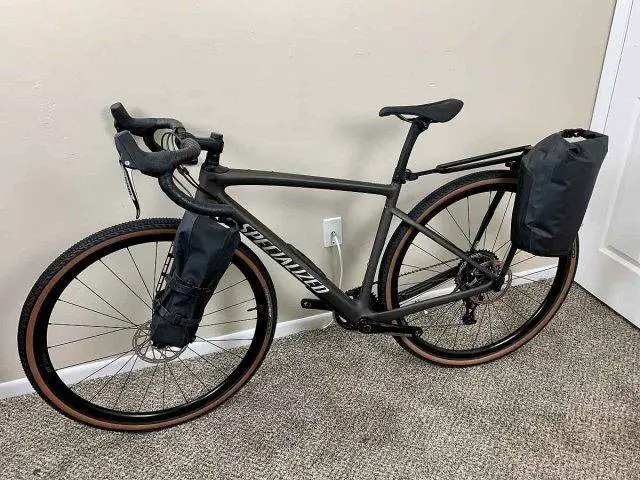
- Large Cargo Cage
- Small Cargo Cage
- Cargo Strap
- Cargo Strap 5L
- Cargo Pack 3L
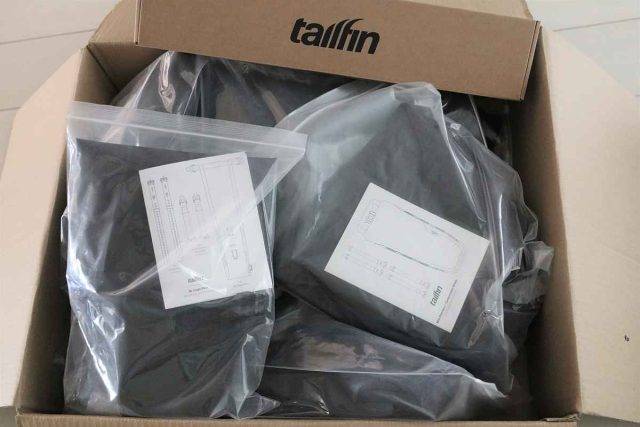
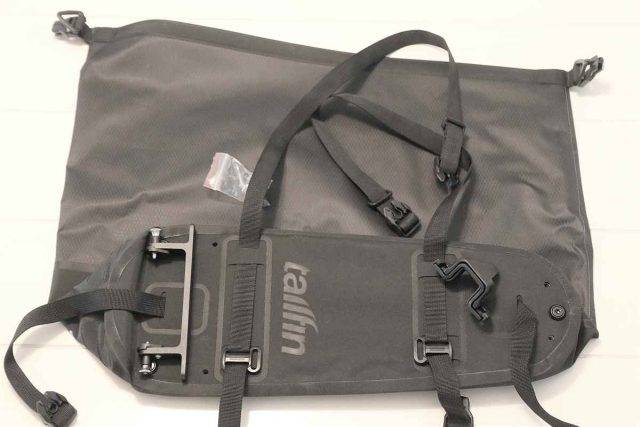
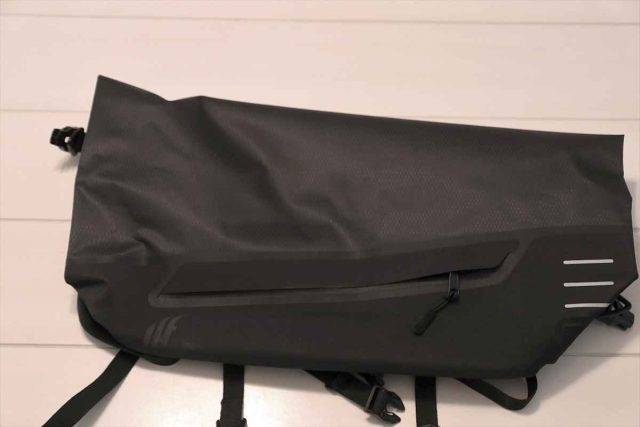
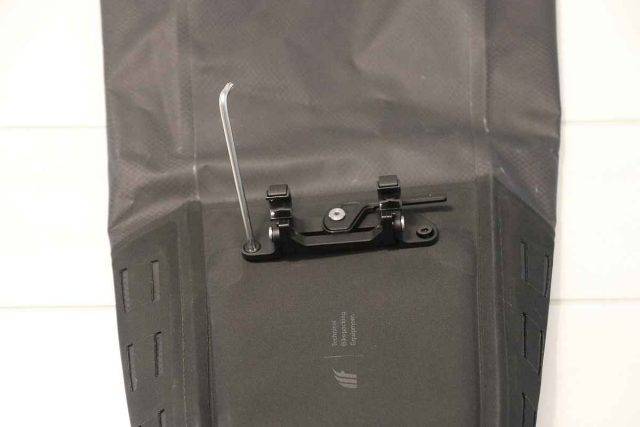
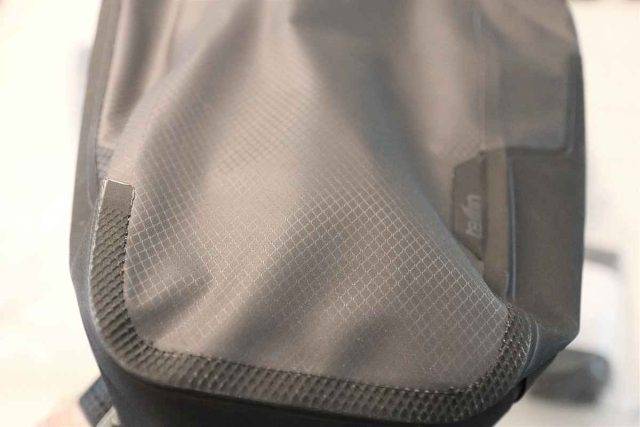
All Tailfin bags are 100% waterproof and are constructed using a process of fabric welding to create a seam free bag. Tailfin nicely reinforces areas of bags that typically see more abuse (bottom edges and back). When you get the bags, some bags do require some assembly, but Tailfin provides the tools necessary for the assembly. This unassembled state allows for a more compact package for shipping and less packaging material.
Axles
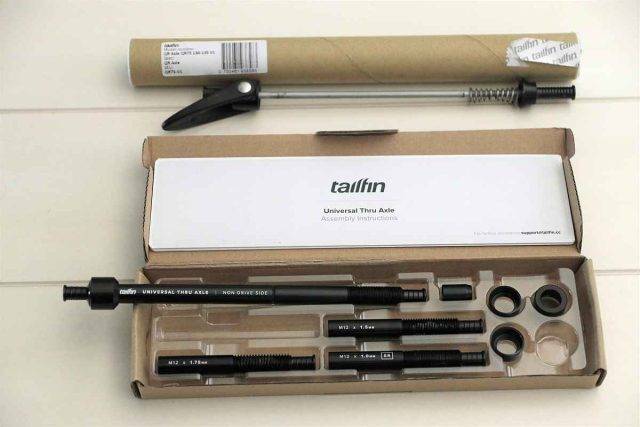
The first step to getting the Tailfin Rack mounted (Carbon or Alloy) is to install the appropriate axle on your bicycle. If you ride a bike with QR axles, choose the QR Axle and you are done. For thru axles it is not the same story. The pitch of threads and the frame spacing will determine which thru axle you need.
Tailfin offers the 12mm Thru Axle in thread pitches of 1.0 mm, 1.5 mm, 1.75 mm, and 1.0 mm Double Lead (for Mavic Speed Release). The axle ships with multiple collars to adjust the length and shape of the end – Flat or Cone. The axles are compatible with all 135mm, 142mm spacing and most 148mm boost hub spacing. Tailfin has a handy guide with drop down menus to help you determine which axle you need and if you need an additional adaptor or nut for your specific bike.
If you know that you will only be using the axle on a single bike you can choose the correct pitch threaded axle and you are done. If you have multiple bikes or want to future-proof your purchase, you can get the Universal Axle which comes with all the sizes mentioned above. The Universal Thru Axle is only 1g more than the single piece Thru Axle, but it does cost $15 USD more (12mm Thru Axle $50 USD and the Universal Thru Axle $65 USD).
The Universal Thru Axle is a two-piece axle that threads together in the middle. The Universal Axle kit comes with one non-threaded side, four threaded ends, a spacer for 148 mm BOOST spacing, and multiple collars. Here are the Assembly instructions.
Rack and Bags
So many bag options to choose from, how does one choose? Good question.
Ideally go for the largest size and you should be fine. What if you are only doing an overnight trip or staying in hotels and you are not embarking on a multi-day self-supported trip? Then all that extra weight from having a large bag does not make sense. But luckily, Tailfin offers a wide variety of options that is sure to satisfy all your bikepacking needs.
As mentioned above, Tailfin offers 22 L bags in a lightweight version or a durable version, for a full review check out JOM’s review (linked above). For this review, the 10L and 5L Mini Panniers will be examined.
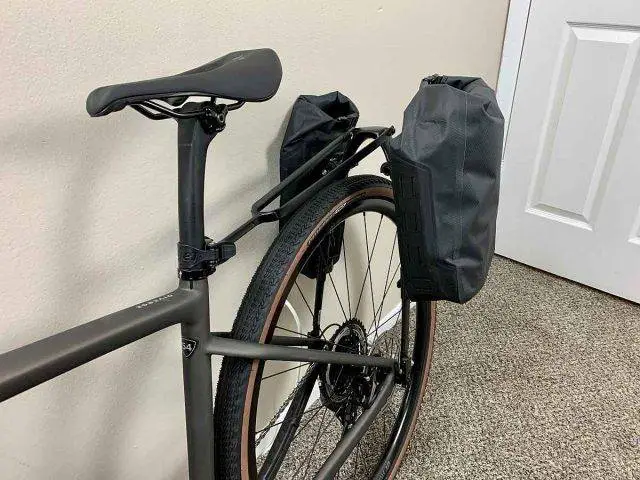
Once your axle or skewer is in place, installing the rack is very fast and simple. Using Tailfin’s proprietary Fast Release Dropouts allows for the Tailfin Rack or AeroPack to be attached/removed in seconds. Next, attach the Top Stay to the Arch, then strap the seatpost connect to the seatpost.
The Rack
The Rack comes in carbon fiber or alloy and both options come with or without pannier mounts. With the pannier mounts version, the panniers mount directly to the rack via the X Clamp system and no other hardware is necessary. If you already own some panniers, you can purchase the Third-Party Pannier Adaptors to make the Rack compatible to most bags.
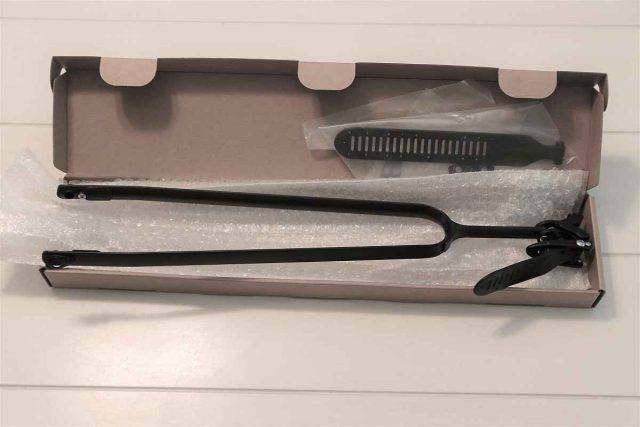
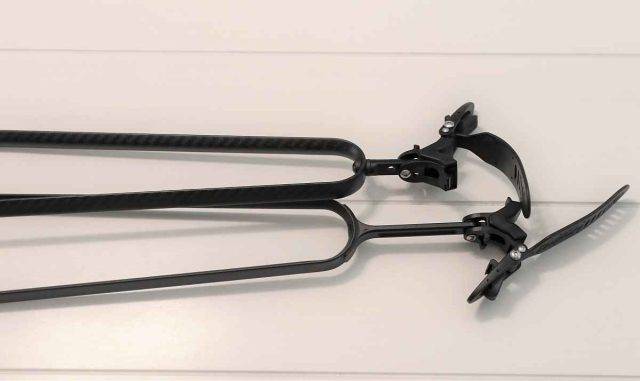
Top Stay
The Top Stay is a crucial part to the Rack system. The Top Stay comes in two lengths (regular and long) for both the carbon and alloy models. To determine what size Tailfin Top Stay is Right for you check out the guide from Tailfin. I tend to ride a small frame and I do not have very long legs, so my seatpost does not extend out of the frame too much. I have found using the long Top Stay to be a better setup for me. It gives me more usable space in the Trunk Top Bag and allows me to level the Top Stay more so than using the short version. This newly designed extended Top Stay is a much-needed addition and will be greatly welcomed by many people.
Trunk Top Bag
The Trunk Top Bag is probably one of my favorite bags. If you are looking for a lightweight and aerodynamic setup, this bag with the Tailfin Rack is where it is at. The bag has a large opening so you can easily access all the things you store in there and the bag can be taken on and off the rack quite easily.
The AeroPack and the Rack use the same Top Bag, but they use slightly different mounting hardware. The Rack uses the Top Stay to mount the trunk bag to the Rack, whereas with the AeroPack, the seatpost connector attaches directly to the trunk bag and the Trunk Top Bag serves as an integrated top stay. Though I have not tried the AeroPack, Tailfin states it is 150 g lighter, but is slightly less versatile than the Trunk Top Bag with the Rack.
My first night of my bikepacking trip, we planned a short ride to a waterfall after setting up camp and dropping off our gear at the campsite. With the Tailfin setup I was able to quickly take off my panniers and trunk bag to lighten my load for the small excursion. I am happy I was able to unload some gear since it was a steep climb out from our campground.
The Trunk Top Bag has a zipper on the side of the bag to allow for easy access into the bag without the need to completely open the bag. The bag has a flap of material that overlaps the zipper to prevent water intrusion when it is raining and while entering the bag. This zipper is a great feature and allows you to quickly access things and if it is pouring rain, entering the bag on the side with the flap gives you access to items in your bag without soaking all the rest of your gear in the bag. The zipper is waterproof too but the extra material over the zipper creates a cover that diverts water away if you are trying to get into the bag while it is raining.

The Panniers
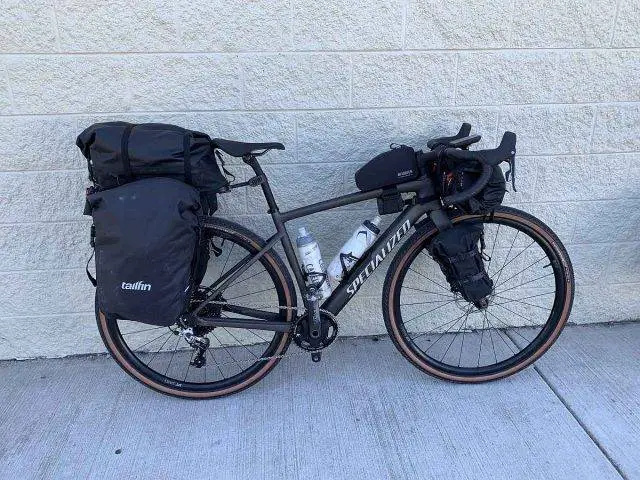
The bread and butter of the bikepacking setup. Tailfin has three sizes available: 22 L, 10 L, and 5 L. With the 22L Pannier option coming in a lightweight version (620 g, meant for road use) or a durable version (740 g, meant for road/gravel use). Though you can purchase the Rack without pannier mounts (saves ~100 g and $70 USD), the loss of versatility, in my opinion, makes getting the Rack without pannier mounts not worth it. This is specifically speaking about my intended uses. I have used the panniers already and I will continue to do so on multi-day bikepacking trips. The Rack without pannier mounts is perfect for daily commuting, overnight bikepacking, or supported multi-day bike trips though.
10L and 5L Mini Panniers
The Mini Panniers are great additions to the Tailfin lineup. These bags round up the range and add a lot of diversity to their product offering. Before these bags, users had no other option besides the 22L Panniers, which could be excessive for short trips. The Mini Panniers help you cut weight when a large amount of storage is not necessary. Using the smaller panniers also forces you to optimize what you carry on your journey and truly take only what you need.
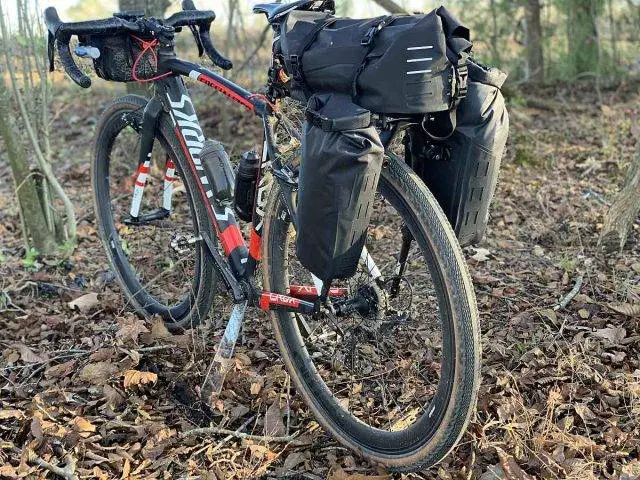
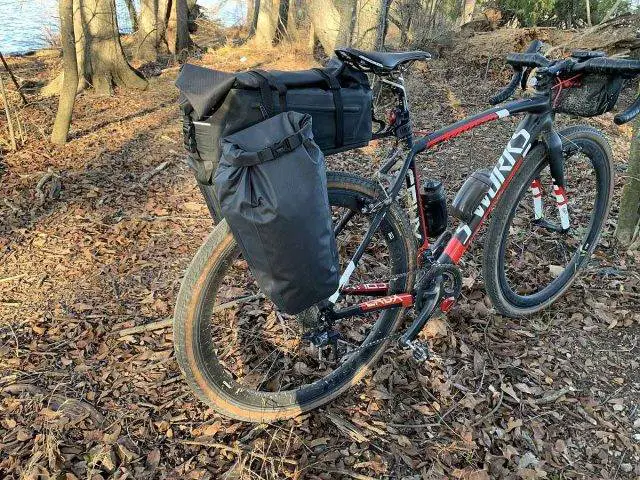
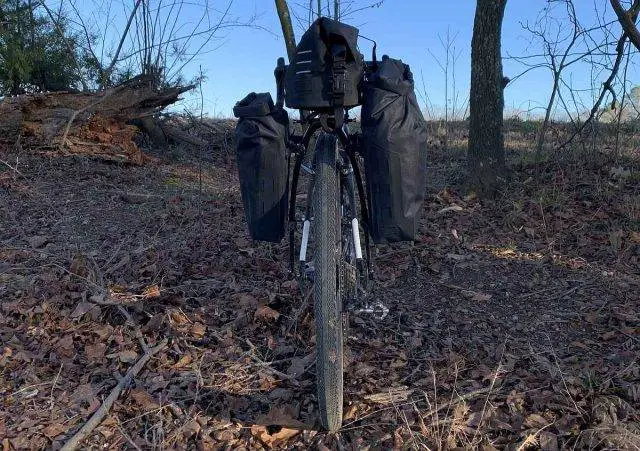
The panniers are designed with a large opening to allow for easy packing and unpacking. The bags have three closure modes (additional T-Hook compression straps are included with the bags). The side closure, top closure, and top closure with compression straps. Side closure works best for fuller loads and the top closure is a more compressed closure.
Tailfin completely redesigned the X Clamp attachment system for the new mini panniers. The anodized aluminum clamping system provides positive feedback when the Fast Cam lever is closed, so you can be reassured you bag is locked down. The new X Clamp system no longer interferes with the attachment pins on the Trunk Top Bag Connector Parts when clamping/unclamping the panniers to the Rack. When clamping/unclamping the 22L Pannier you must detach the Trunk Top Bag because it will hit the pin. I found this a little bit annoying especially if you want to leave the trunk bag on, but I am glad this has been resolved on the new design iteration.
The 5L Mini Pannier will allow you to pack about two pairs of clothes and one cycling kit or some similar combination of clothing depending on how thick the clothes are. This makes for a perfect weekend or overnight bag for bikepacking. Then you can use the second bag for dirty clothes.
The 10L Mini Pannier is twice the size and thus could carry two times as many clothes. But, for lightweight bikepacking, most people will only take a few pairs of clothes anyways. The extra space can allow you to bring along a few extra creature comforts that you might not need on short trips. The second bag could be used to carry food and cooking gear.
Cargo Cage System
The Cages
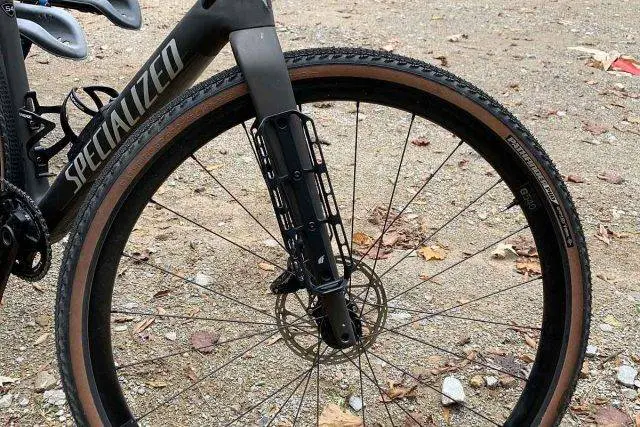
The Cargo Cage is made from machined 7075-T6 aluminum. These are weld free, plastic free cages built with strength in mind and are designed for worry free load carrying. They only come in black though. See the table for some of the specs of the cargo cage.
The Tailfin Cargo Cages come in two sizes, large or small. Depending on your frame size, fork mounting style, and bag size will determine what size will work best for your application. These can also be mounted to the Alloy Rack, or a standard water bottle mount located on your frame.
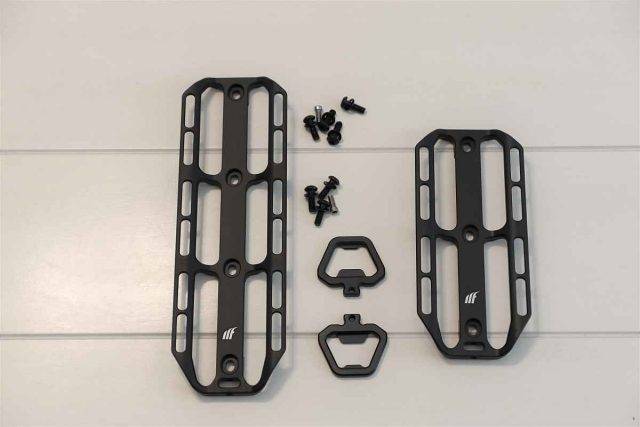
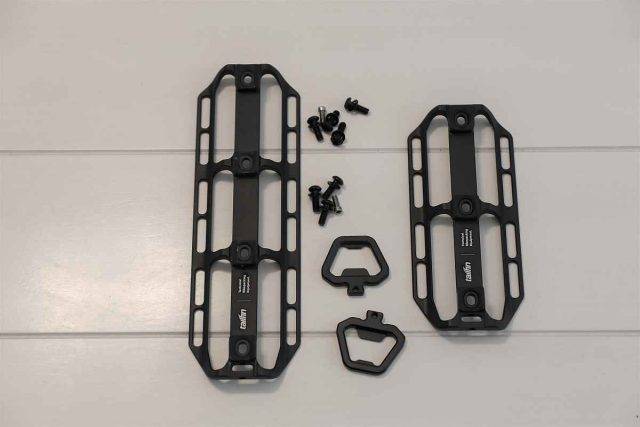
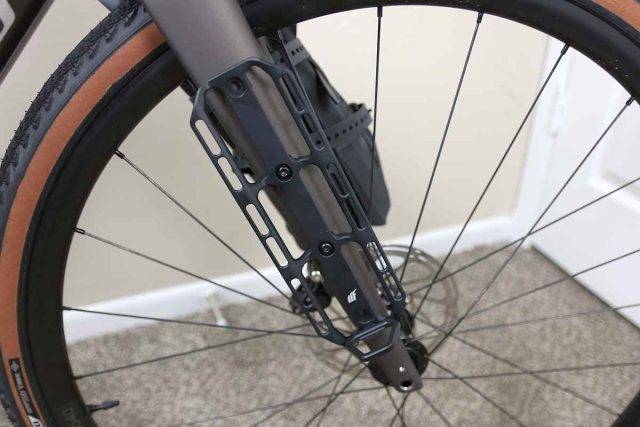
The Cargo Cages are cleverly designed with a concaved shape to securely hold all kinds of gear.
For gravel or adventure bikes, there are two main types of bolting patterns available for fork mounts, 2 or 3 holes. The Specialized Diverge in this review has a 2-hole mounting pattern, but the new STR Diverge now comes with three holes. Other bikes, like the Gian Revolt comes with a 2-hole fork mount and the Canyon Grizl comes with a 3-hole mount.
The Load Clip is meant to serve as a cradle to carry heavier items, but without it attached it allows you to carry long items. The Load Clip doubles as a bottle opener. I did not try its capability to open a bottle and I do not think I would recommend it. First, the bottle cap will mark the load clip, which would bother me, and second you are putting forces on the fork that it may not have been design for (specifically speaking about carbon fiber forks). The forces are probably small, but over a long time it could be significant.
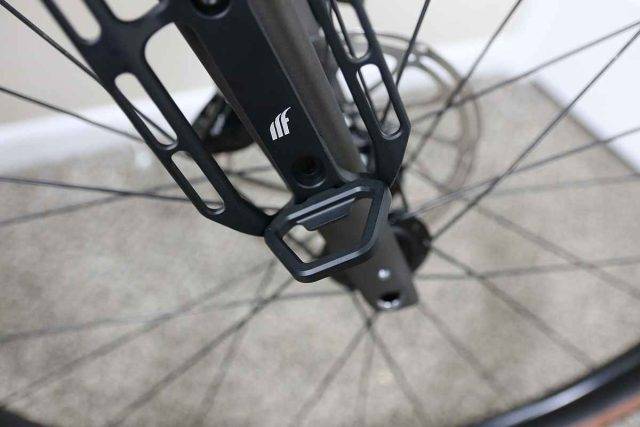
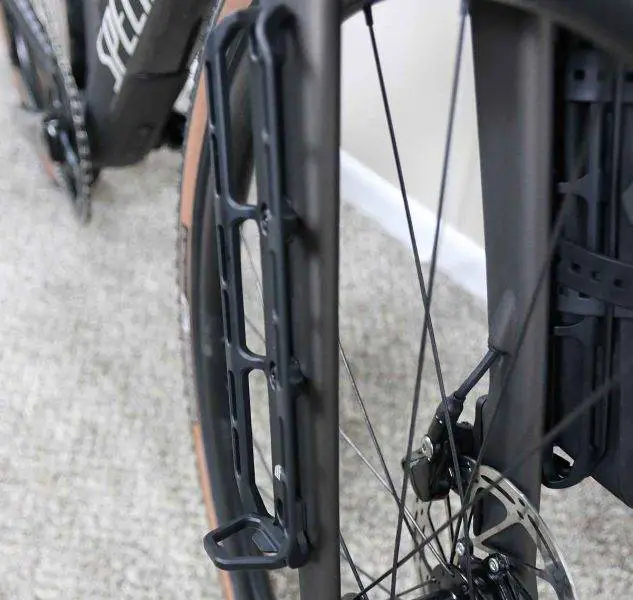
For my trip, I had both load clips installed. One bag was carrying a jacket, and the other bag had my propane tank and Jetboil. With the Load Clip on, the bag sat quite high and would hit the frame when turning the handlebars. Thus, I took the load clip off for that bag. In hindsight, I could have lowered the large Cargo Cage and attached it to the frame using the top two holes and this would have also resolved the issue.
My recommendation, if trying to decide between the large or the small cage would be if you ride a smaller frame (54 and below) and only have a 2-hole mount on the fork to go with the large cage. This will provide a bit more mounting variability. If you ride a larger bike frame the small cage will work perfectly since you will have more frame clearance and you can save some weight in the process.
Cage Packs
A new addition to the Tailfin lineup includes the Cage Packs. These bags come in three sizes 5 L, 3 L, and 1.7 L (not included in this review). These bags are fully waterproof and are designed to be used in tandem with the Cargo Cage. The bags have Speed Hooks on the front of the bag to ensure reliable and repeatable mounting of the bag. It is designed to be a rapid removal bag, but it is not quite as fast as the X Clamp system.
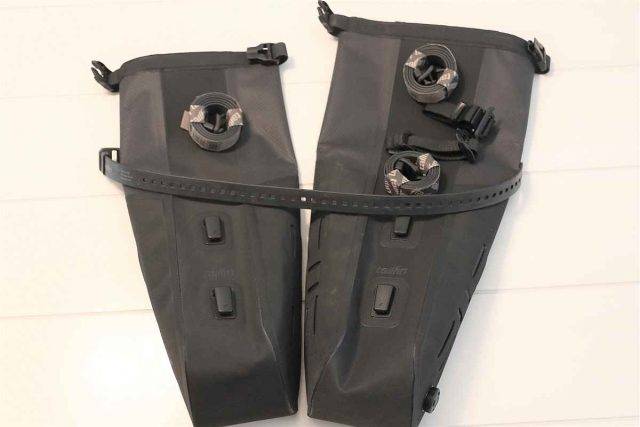
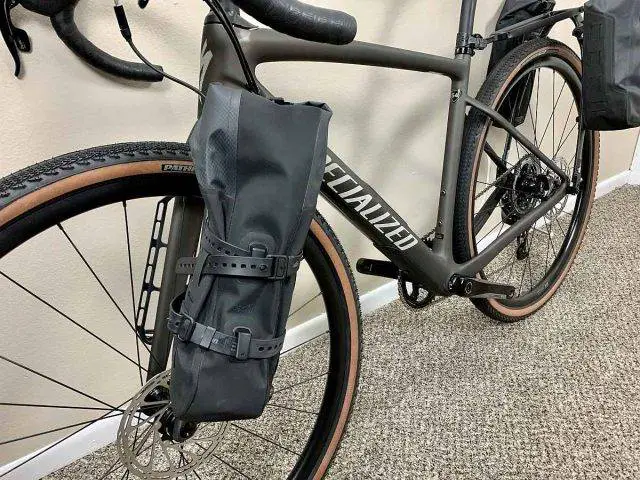
The bags are attached to the Cargo Cage using a Thermoplastic Polyurethane Strap. The straps are 20 mm x 400, 500, or 600 mm long and are 30, 35, 42 g respectively. The straps are 2.5 mm thick, and each length corresponds to a particular Cage Pack.
One of my favorite features on the 5L Cage Pack is the air vent. It allows you to compress the load and really strap down the bag nicely. I would kind of like to see the air vent added to the panniers too, but it is not as crucial with the panniers as it is for the Cage Pack.
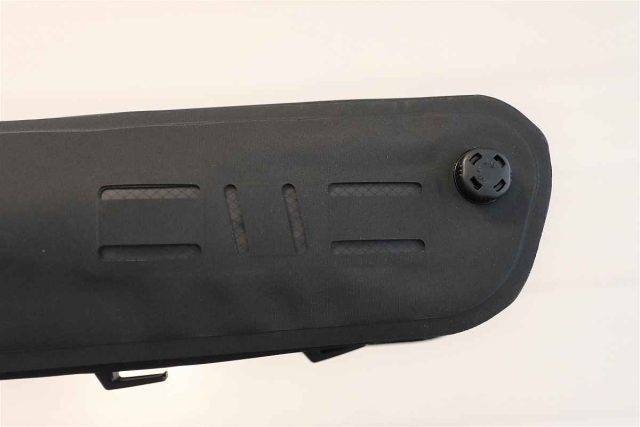
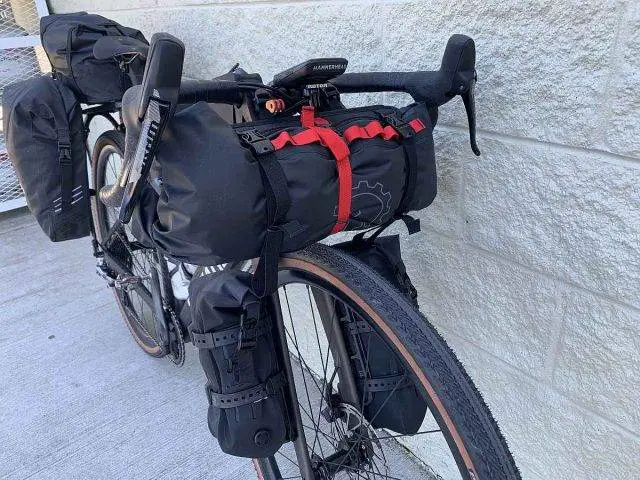
The Cage Packs are great little bags that allow you to carry extra goodies without weighing down your ride. They take a bit more time to open and if you remove items from the bag you will need to resecure the bag again. It is my recommendation to only store things you only need access to once you arrive to your camp. They can be a bit fussy when you first start using them, but after using them a couple times you get the hang of them.
The Bikepacking Trip
I have used the Tailfin rack on multiple adventures now. The setup is so quick and easy. I love how the rack comes on and off with just unclipping the seatpost clamp and releasing the fast release dropout. This allows you to convert your bike into a traveling rig in minutes and keeps you from having to mount a traditional permanent rack to your bike.
The most recent trip I took was a 3-day 3-night adventure that covered about 250 miles. Rough roads and some gravel sections were encountered, but the Tailfin system did not budge. There was no rattling, and the bags stayed in place. These bags are quite impressive.
Another impressive moment in the trip occurred when a group of road cyclist passed us. As they were passing, one of the riders commented how it would be faster if we weren’t loaded down. Captain Obvious had a point, but once we arrived at our destination, we wouldn’t be very comfortable without food, cooking supplies, or sleeping gear.
We took it as a challenge and jumped onto their wheel at 20 mph. Loaded down with about 70 lb of gear, we rode with them for a few miles before they turned off. This goes to show that even though I was loaded down, the extra gear wasn’t causing a huge drag and I was able to go fast.
The Trip was very successful, and I probably took way too many things with me, but the Tailfin bags were more than capable with my cargo. I had a blast, and the Tailfin gear did not let me down a single time.
Thoughts on the Gear
I honestly love these Tailfin bags and the Rack. I think they have one of the most unique rack systems and arguably is the best rack and pannier system. They are lightweight and quite aerodynamic. The 22 L pannier might not be big enough for some people, but you can pack quite a bit in them and if you add the trunk bag you have a lot of storage capacity.
It is great that Tailfin has a few new sizes of pannier bags. These are great waterproof bags that will last you many miles of bikepacking adventures. I did not really get to test the water repellant capabilities of the bags on my adventures, but I tested them in a simulated rain shower at home in the bathtub. The water beads up on the material and when the bags when properly closed are completely waterproof.
The Cargo Cages are a great addition to the bikepacking setup. They allow you to mount a wide range of things to your bike and are extremely versatile. I think they look cool on the bike even when they are not in use.
On the Tailfin website, there is a picture of a bikepacking setup with the 10L Mini Panner mounted to a fork rack. This seems like a great Idea, because I love how simple it is to attach the Mini Panniers. The 10L or 5L Mini Panniers are lightweight and will not make the front of the bike feel unstable when loaded down. In the future, it would be great to have some sort of Cargo Cage adaptor that would allow for mounting a Mini Pannier to the fork without having to use a third-party fork rack.
The Tailfin team has thoughtfully designed and engineered this system. The bags are very versatile and allow for a wide variety of securing configurations to meet all types of adventure setups and cargo that will be carried.
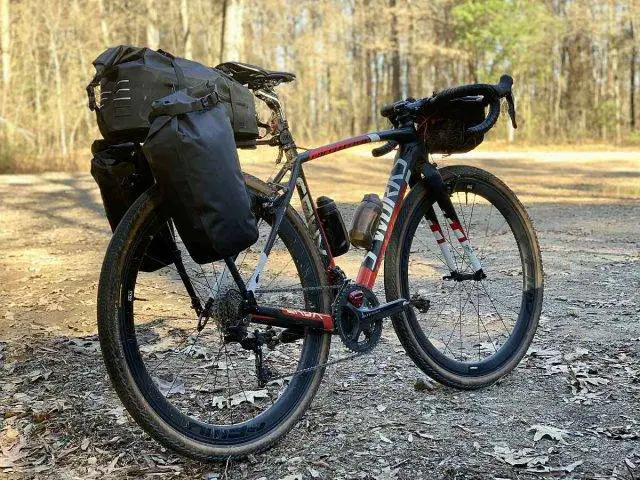
Ultimate Bikepacking Setup
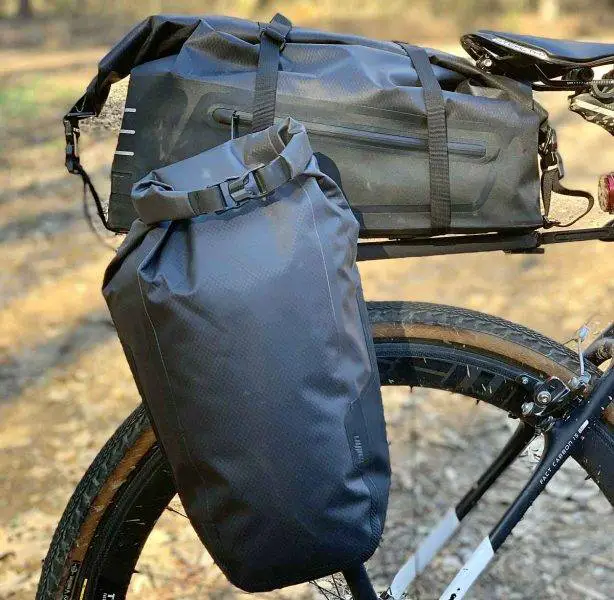
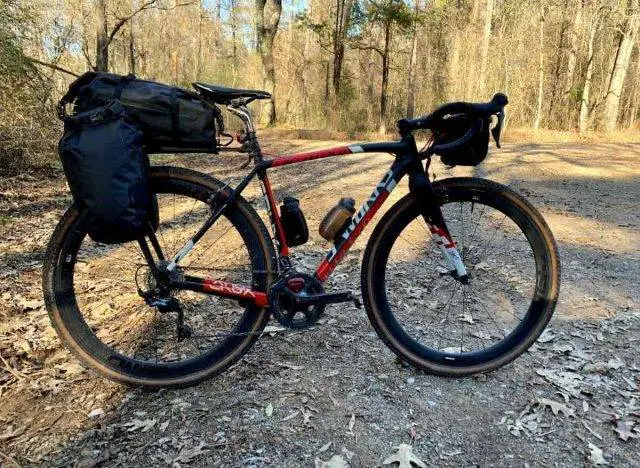
I am on a quest to assemble the ultimate bikepacking setup. This includes the bags/racks to carry things and the minimum amount of gear I need to be self-supported on a multi-day adventure. I am still in the optimization phase, but with every trip I am getting a little closer. Currently, the ultimate setup is not solely available through Tailfin, but hopefully soon it can be. Tailfin R&D riders can be seen using prototype frame bags, top tube bags, and more. I am hoping to try those bags soon and to enhance my bikepacking experience with their new products. My ultimate setup does include using the Tailfin Rack/panniers and Cargo Cage System found in this review.
About Jason Lopez
Jason Lopez of JayLo Cycling is a Structural Design Engineer based in Huntsville, AL. He is an avid cyclist and has over 10 years of combined experience between riding, training, and racing. His first love is road cycling, but he will have a heavy focus on gravel riding and racing this upcoming year. When not riding his road or gravel bike, you can probably find him somewhere lost in the woods on his MTB or on another bikepacking adventure.


