

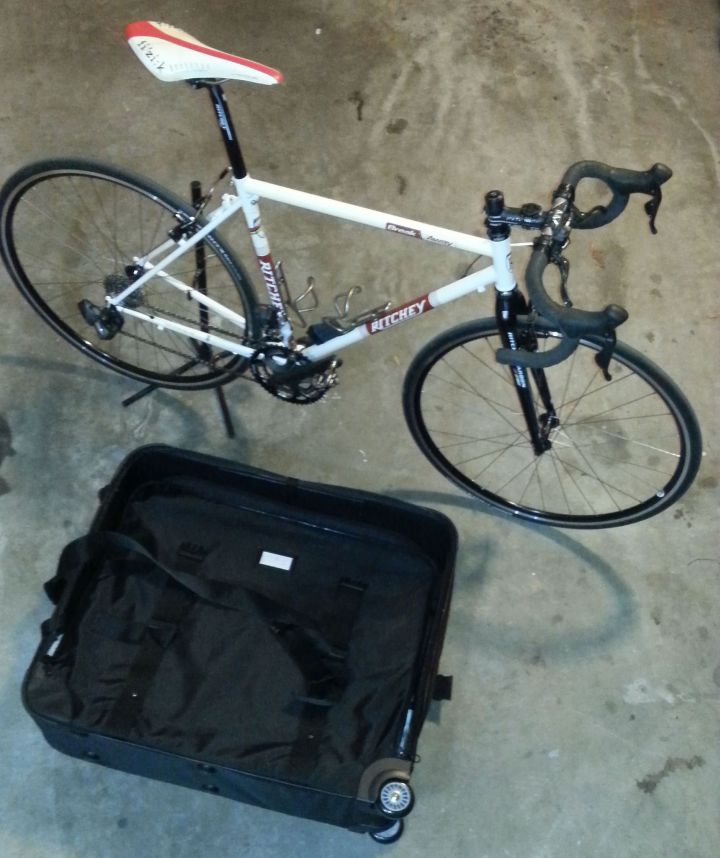
Ritchey Break-Away Steel Cross Frameset
The Ritchey Break-Away (Steel) cross frameset is a full size bike / frame, that can be split apart to fit into a travel case.
Unlike coupled bicycle solutions, Ritchey’s patented locking compression system adds only 100 grams to overall frame weight. When one is flying a bicycle to an event / race, every gram counts.
You can read more about Ritchey’s specifications of the frameset HERE.
How does it Ride?
 In short, like any regular double triangle frame I have ever owned. Unless you look at the bike closely, there is no discernible difference in appearance of the Break-Away frame, versus a regular, lightweight steel frame.
I rode and raced my personal Break-Away frame earlier in 2014 in the states of South Dakota, North Dakota, Minnesota, Wyoming and Montana. This trip culminated in my attendance at the 2nd annual Gold Rush Gravel Grinder in Spearfish, South Dakota. For the duration of this trip, the bike was shod with comfy, no nonsense 32 spoke wheels front and rear, and uber powerful TRP Mini-V brakes – who says you need disc brakes!?
The bike performed flawlessly on all terrain; gravel, dirt, mud, small rocks, and pavement. I do attribute the Clement Xplore MSO tyres to helping with the great ride. Incidentally, my wheels were not configured tubeless. For a week long trip, I cannot justify the extra hassle of configuring wheels in this manner. But ordinarily, tubeless is the only way to go!
As pictured, but with Clement Explore MSO tyres installed, the bike weighs around 19lbs. I’ve also swapped out the supplied fork for an all carbon, Ritchey WCS Cross fork. 19 pounds is a very respectable weight for such a bicycle. I need a bicycle that is solid, and can stand up to the beatings that it may be subjected to on dirt, limerock and gravel surfaces. Thus far, the Ritchey Break-Away Cross has met all of my expectations.
I will post further impressions in Part Two, as I continue racking up miles on the bike.
Not your regular Break-Away
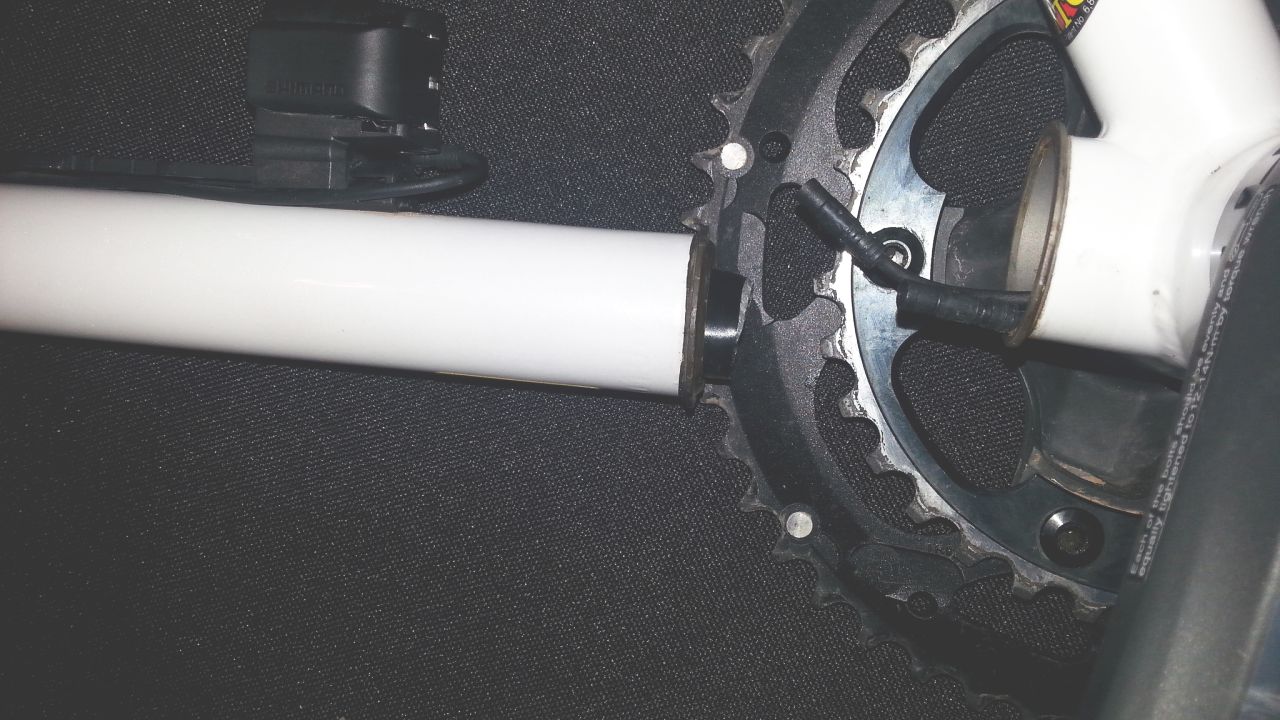
Break-Away and coupled type bicycles require cable splitters for brake and shifting duties. However, you can eliminate the shifting issue if you’re like me, and have embraced electronic gear shifting technology. Shimano’s Di2 system has been reviewed countless times, but an area it shines is on a travel bike. I only have to disconnect the front and rear derailleur battery wires, from Junction box B, in order to pack the frame. No other shifting adjustment required. How easy is that!?
This next part isn’t recommended unless you like drilling holes into expensive things.
To make life easier, my Break-Away frame has been drilled for Di2; namely, there are four simple drill holes at appropriate places on the frame, to allow Di2 E-Tube cables to be installed internally. Drill holes are located towards the rear of the right chainstay (rear derailleur), lower seattube (front derailleur), midway along the downtube for the external battery mount (Shimano hadn’t released the internal battery when this frame was drilled), and one more hole on the upper downtube, for the wire that joins Junction A to Junction B.
How does it Pack?
This is the most difficult part of the operation, but is easy once you’ve gotten a little experience under your belt. Before you follow the disassembly instructions, I recommend the following:
- Mark you seatpost height with a piece of electrical tape, marker pen, etc.
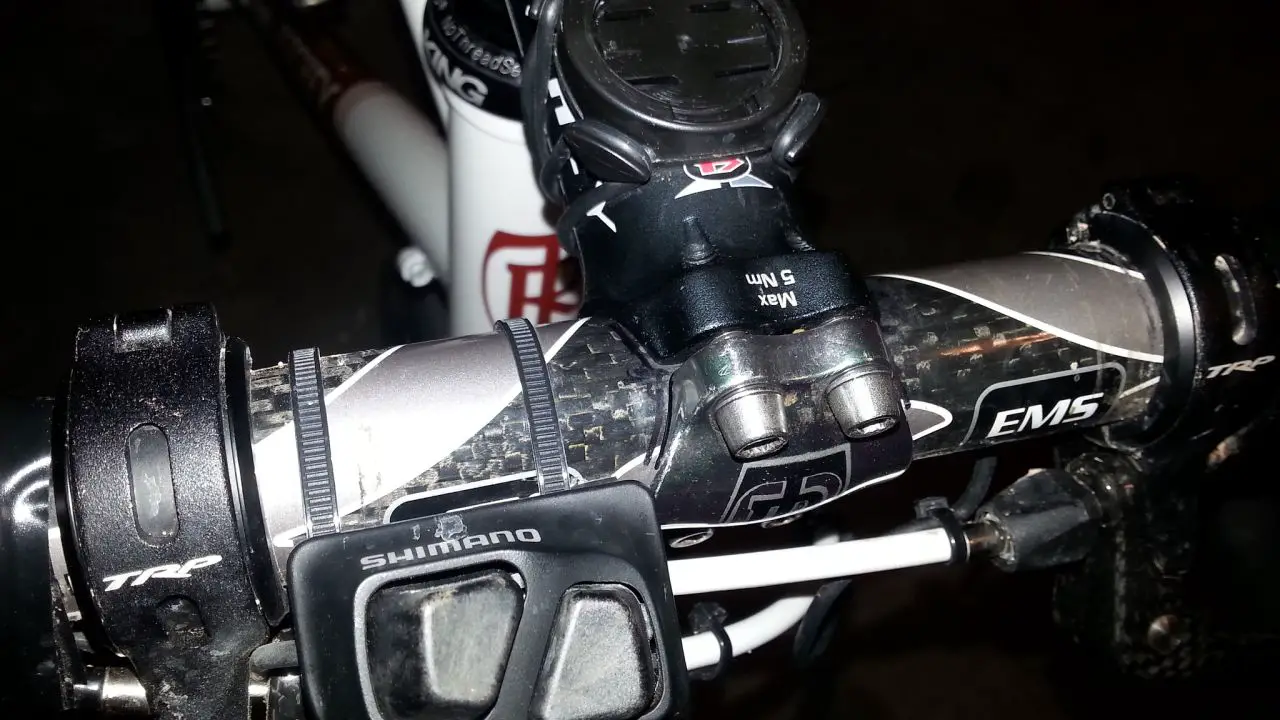
- Use a marker pen to trace onto your handlebars, the position of the handlebar relative to the stem.
The following steps are how I (JOM) disassemble and pack the bike. Follow at your own risk, I’m not responsible if you screw up, and don’t pack your bike correctly. My method is a recommendation only… now that the disclaimers are out the way, read on 🙂
Step One

Remove the chain, rear derailleur, pedals, bottle cages (re-install the bottle cage bolts), computer and saddle bag (if appropriate). Pack and protect all of these items; they will all fit inside the Ritchey bike case. There are several areas inside the case for storage of these items.
Disconnect / split all gear and brake cables. For the rear brake, you only need to break the coupler connection. For the front brake, you will need to release the cable from the brake.
Step Two
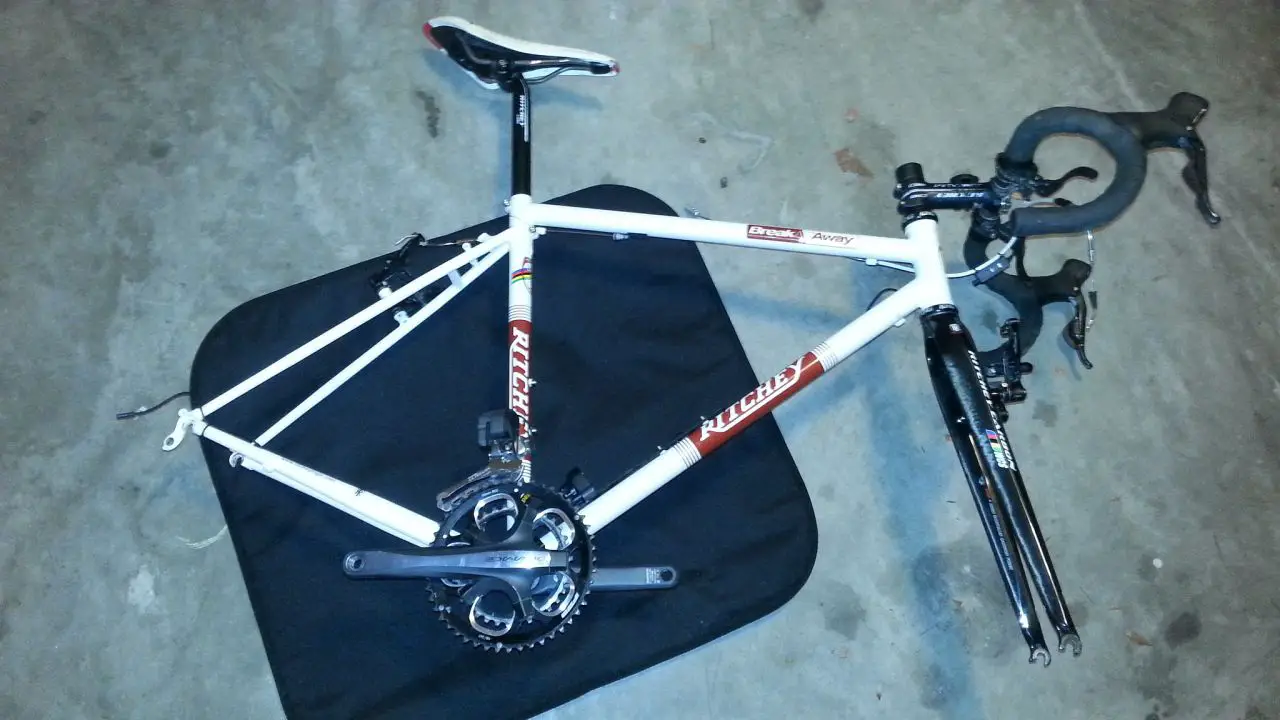 Remove the wheels from the frame. Remove the quick releases from each wheel, and store inside the case.
Remove the handlebars. Re-attach the headset top cap, and retain any headset spacers on the steerer tube.
Break the frame in half. I find this is made easier if you lay the bike down on the wheel protector mat, that comes with the Ritchey case. Loosen both seat clamp bolts, and slide the seatpost out of the frameset. Prepare the saddle and seatpost for storage inside the case.
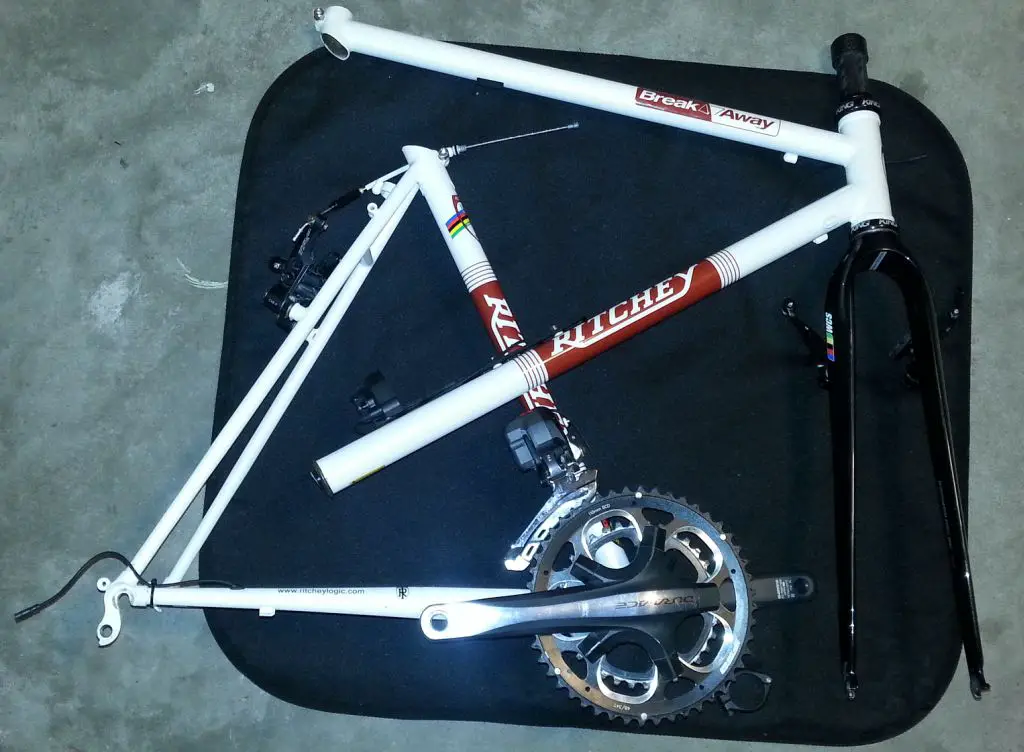 Using the Ritchey supplied torque key with a 4mm hex, or any 4mm allen key for that matter, loosen and remove the coupler joint near the bottom bracket, to complete splitting the frame.
Step Three
This is the funnest part of the operation. Making everything fit inside the case. Before you do any packing of the frame parts and wheels into the case, I recommend the following:
- If not already the case, install tyres onto the wheels. Tyres will help protect the wheelset when it’s stored inside the case.
- Wrap and protect each part of the frame and handlebars with the supplied Ritchey frame wrapping materials. Add your own padding and bubble wrap to supplement.
Ritchey’s documentation provided with the frameset works perfectly well, if you follow it closely. Placing the wheels into the case in the recommended manner seems like nothing else will fit. With a little patience and practice, everything will fit just fine.
As such, I’ll repeat Ritchey’s recommendations verbatim, with a few pointers of my own:
Step Three (A)
Place rear wheel, cassette side down, sans quick release into the case. If using the Ritchey case, there is a convenient metal plate with recess, for the wheel axle to sit.
Step Three (B)
 Place front wheel slightly offset on top of the rear wheel sans quick release. I recommend placing foam padding material between the wheels, to protect them from damaging each other. Nobody likes their nice hubs being scratched up!
Step Three (C)
Place protector mat on top of wheels. Tie / connect case scraps to lock the wheels down.
Step Three (D)
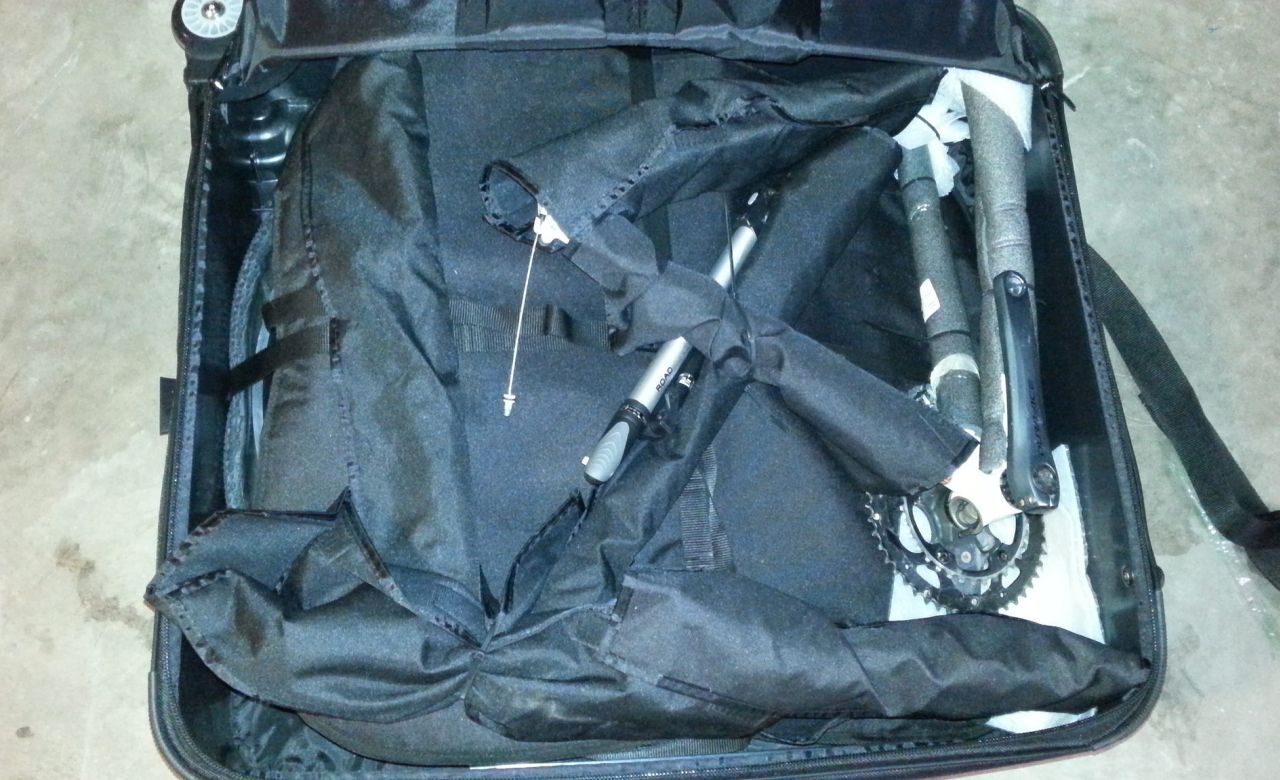
Follow the rest of the Ritchey instructions from this point on. Note, I choose not to store my handlebars / stem inside the same case as the bike. The bars will fit, but rather, I prefer to store them in my second suitcase, protected by clothes and such. Personal choice only.
Step Four
Use free space within the case to store things such as your shoes, travel pump, clothes, spare parts, etc. Be cognizant of the case weight limitations imposed by the airlines.
DO NOT BRING CO2 cartridges with you. They are a restricted item. The TSA folks will open your case, and dispose of them.
Look forward to saving on baggage fees at the airline counter!
Gallery, additional images – Click a thumbnail image to see full size (hosted by Flickr).
[alpine-phototile-for-flickr src=”set” uid=”126879102@N04″ sid=”72157649815654895″ imgl=”flickr” style=”gallery” row=”6″ grwidth=”800″ grheight=”600″ size=”240″ num=”11″ shadow=”1″ highlight=”1″ curve=”1″ align=”center” max=”100″]
PART TWO OF GRAVEL CYCLIST’S RITCHEY BREAKAWAY REVIEW IS HERE.