

I wrote about the Ritchey Breakaway Cross disassembly / packing process, in Part One. My most recent trip with the Breakway was from Gainesville, Florida, to Adelaide, South Australia.
This journey featured four flights:
- Gainesville, Florida -> Atlanta, Georgia.
- Atlanta, Georgia -> Dallas, Texas.
- Dallas, Texas -> Sydney, Australia.
- Sydney, Australia -> Adelaide, South Australia.
During this time, the bike and case were chucked around by various baggage handlers, and opened at least once by the TSA in the US of A.
Because I’m a bit type A about packing my travel bike, the bike arrived unscathed, barring the rear wheel being out of true. Steven Van Olmen of the Lotto Soudal professional cycling team, in town for the Tour Down Under, was nice enough to true up the rear, and touch up a minor blip on the front. It isn’t every day one of the best mechanics in the world works on your bike!
The Unpacking Process
Step One
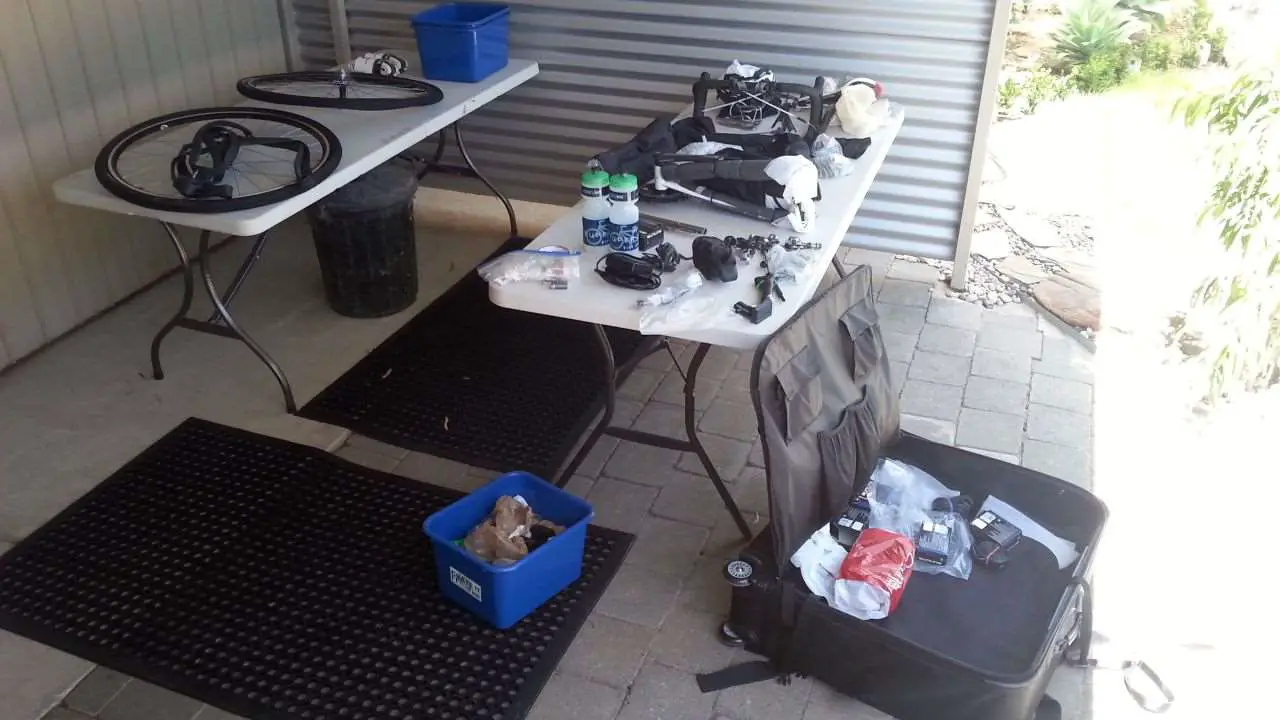 Open the case, and hope the airlines and TSA haven’t trashed everything inside 🙂 Use an open space with plenty of room to work. In my case, I’ve got access to a couple of folding tables that made laying everything out nice and easy. I packed a lot of extra gear in my Ritchey case, including tools, spare tyres, tubes, etc. My motto with bike gear; better to have it than want it!
Step Two
 Take your wheels, and install tyres, tube and quick release skewers. Inflate tyres to appropriate pressure. This is also a good time to inspect wheels for damage. Note – it is not recommended one take high zoot carbon or aluminium wheels. They will get knocked around in transit. My travel bike wheels are built with brass nipples, for ease of maintenance.
Step Three
 Join the frame together. As mentioned in Part One of my review, I’m fortunate to have Shimano’s Ultegra Di2 system on this bike, which makes assembly and disassembly an absolute piece of cake. In my case, I reconnect the front and rear derailleur cables into the Di2 Junction B box, before I join the frame together.
For mechanical shifting, you’ll need to rejoin your cables using the Ritchey supplied derailleur cable splitters. Reconnecting the shifter cables is typically the last step you’d perform, if your bike has mechanical shifting.
Step Three (A)
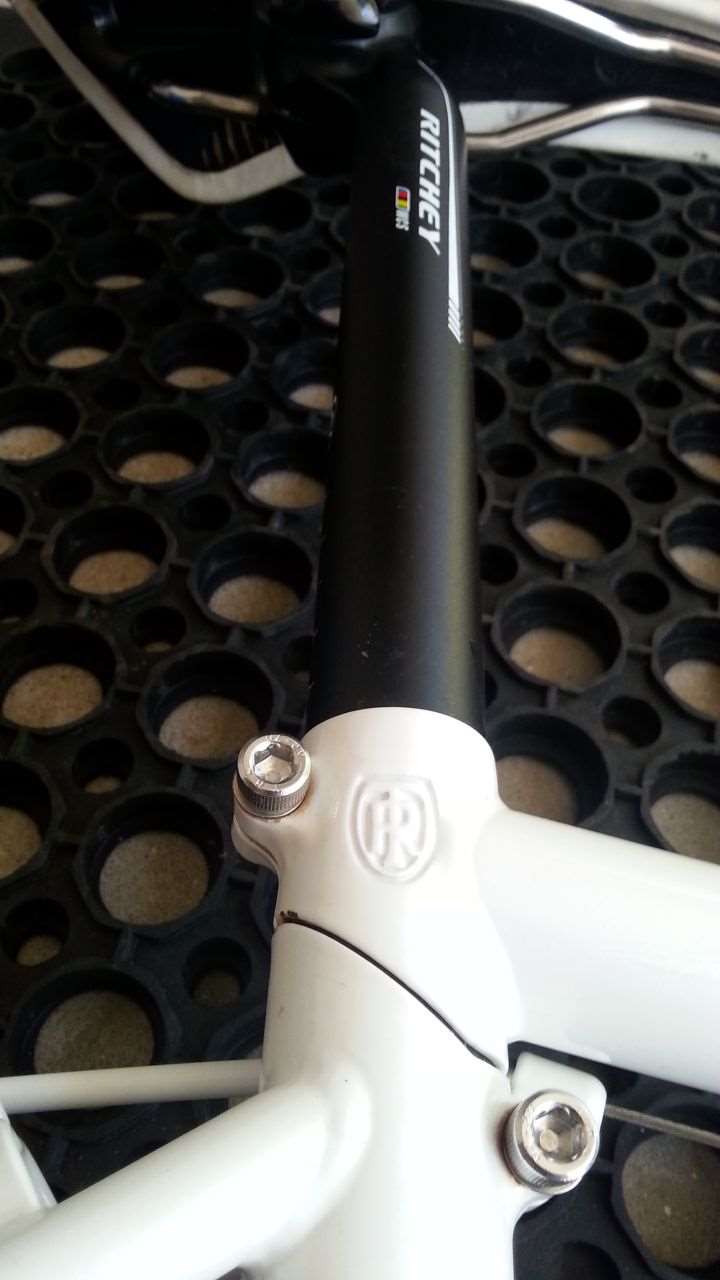 Insert the seatpost into the two frame halves. Don’t worry too much about aligning the saddle in it’s left / right position, but do set the seatpost height correctly. I keep a piece of electrical tape on the post to make my exact position. Tighten down the seattube bolts to Ritchey’s specifications. Going beyond their specifications may damage the frame, and hence void your warranty.
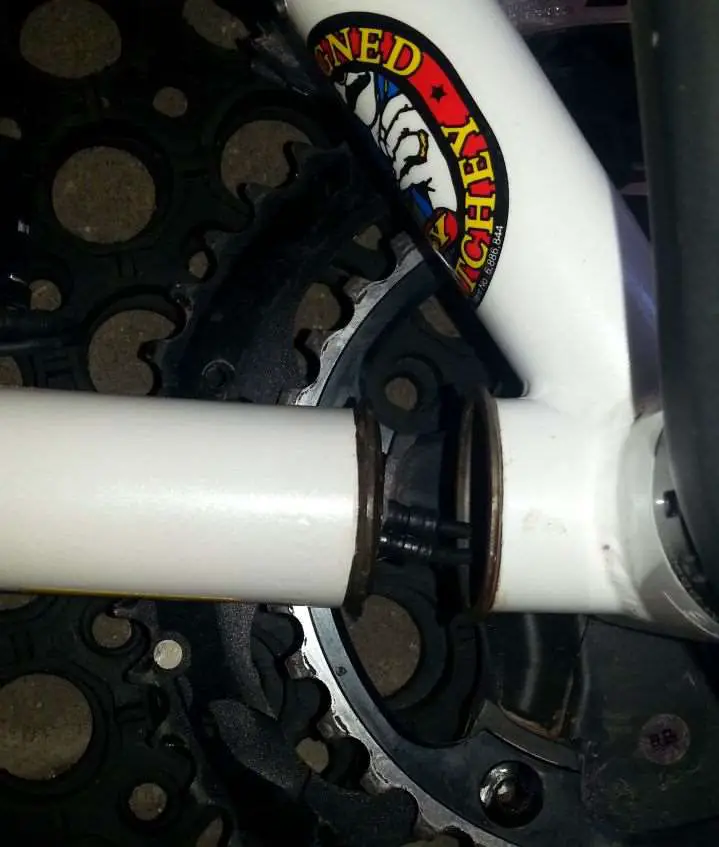
Step Three (B)
Join the bottom half of the frame using Ritchey’s Hinge Clamp. See the photo above with the Di2 cables; this is where the Hinge Clamp is fitted. Note, there are two sizes of this clamp. If re-ordering, be sure to order the correct size for your frame. These clamps do have a tendency to wear over time, if the bike if frequently packed and unpacked; by that I mean, if the two halves of the clamp eventually touch each other at the connector bolt, they will need to be replaced. The clamp will never wear from regular riding use.
Tighten the Hinge Clamp using appropriate torque specifications. Ritchey supply a handy torque key with allen key fittings. This will ensure you do not overtighten, and possibly damage the frameset.
Step Four
Install the handlebar onto the fork. In my case, I typically leave the stem attached to the fork steerer, so I only need to attach the handlebar, making sure to line it up appropriately with the stem. See Part One about reference markers for handlebar position.
Step Five
Install the wheels (lock down the skewers appropriately), rear derailleur, chain (I always remove these two items for shipping) and pedals. This is a good time to ensure your saddle is aligned appropriately with the frame.
Step Six
Reconnect the rear brake using Ritchey’s quick brake connector. Reconnect the front brake at the brake cable attachment point. If you have mechanical shifting, reconnect the derailleur cable splitters, and adjust your shifting. Give the bike a final inspection, making sure to double check frame connections, handle bars, etc.
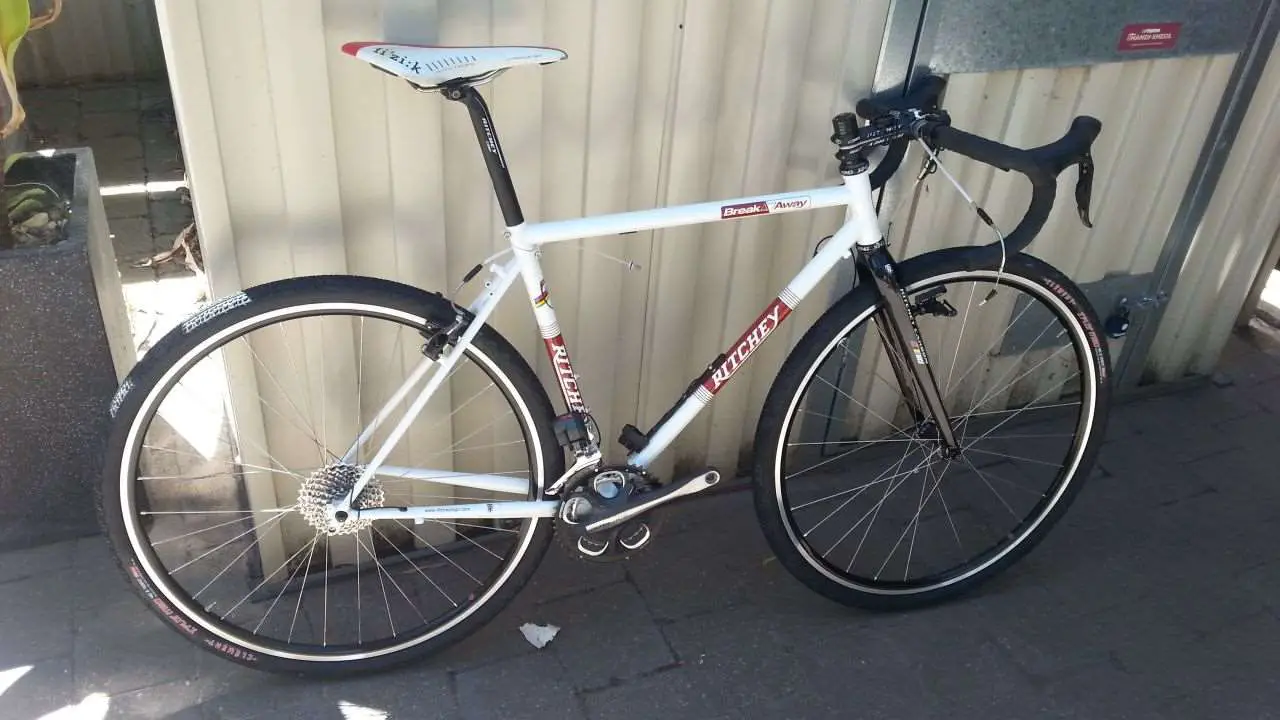
Go ride!
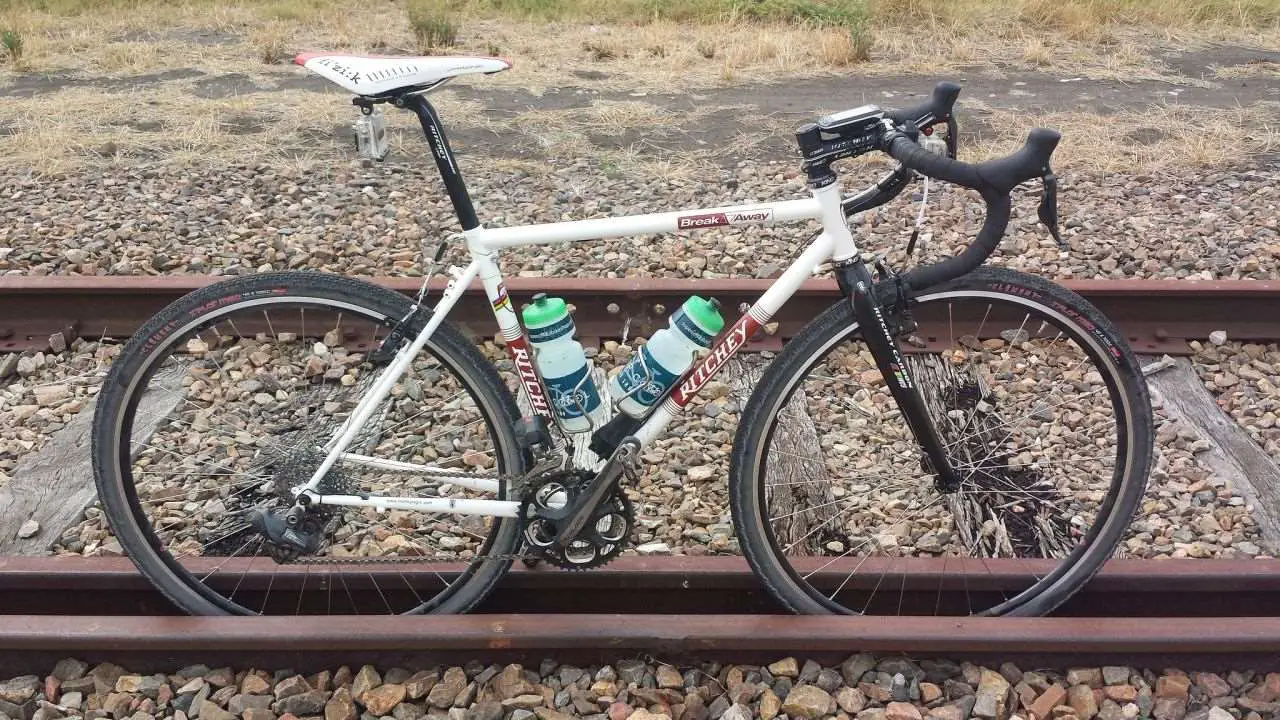
This bike isn’t light by today’s standards, but there is more to life than lightweight bikes. The Breakaway Cross rides like one would expect from a quality steel frameset; smooth and comfortable. With bigger tyres inflated at 35psi, it’s ride is almost Cadillac-like. The bike’s empty weight sits at around 19lbs (around 8.5 kilograms), making this bike light enough to race, either for regular cyclocross, endurance / Ultra CX, or simply having fun on dirt and gravel roads. The bike is a very capable handler, and has inspired confidence every time I have descended a genuine mountain road, on paved or dirt surfaces. This belief from manufacturers you need a “gravel specific” bike to have fun on gravel / dirt roads isn’t quite right. But, those manufacturers are in the business of selling bikes, so you can’t blame them there 🙂
No disc brakes? They aren’t required in my situation. The TRP CX 8.4 brakes are powerful, with plenty of modulation and braking control, even in wet conditions. However, I wouldn’t recommend the CX 8.4’s for regular cyclocross, as clearance between rim and pad isn’t stellar (the Avid Shorty Ultimates really shine here), and their power is overkill. For descending long grades, the CX 8.4’s are fantastic.
Overall, the Ritchey Breakaway Cross has proven to a reliable machine and offers fantastic value for money, which is enhanced when you take into consideration the savings you can make when flying with it. Gravel Cyclist recommended!
JOM’s Ritchey Breakaway Bike Specifications
Frame: 2013 Ritchey Breakaway Cross, size 54cm.
Fork: Ritchey WCS All carbon, straight lade fork (not the stock fork).
Headset: Chris King 1 1/8″.
Seatpost: Ritchey WCS 27.2mm x 350mm, single bolt, aluminium.
Saddle: Fizik Arione.
Wheelset: American Classic RD 2218 rims with Shimano DuraAce 9000 series hubs. DT Revolution spokes 3X on the front wheel, DT Revolution / Competition mix on the rear wheel, 3X. Brass nipples everywhere.
Tyres: Clement X’plor MSO in 40mm, or Michelin Jet. Neither are configured tubeless, due to the hassle factor of flying.
Quick Releases: Control Tech Titanium Bolt-on, circa 1997. I LOVE these things.
Handlebars: Kestrel Carbon EMS in 42mm.
Stem: Bontrager RXL 90mm.
Shifters: Shimano Ultegra Di2, 10 speed.
Derailleurs: Shimano Ultegra Di2, 10 speed.
Crankset: Shimano DuraAce 7900, 170mm (I use 170mm or 172.5mm cranks).
Bottom Bracket: Shiano DuraAce 9000.
Pedals: Shiman XTR 980.
Cassette: SRAM PG1070 11-32
Brakes: TRP CX 8.4.
Bottle Cages: King Titanium.
Hi there, Excellent article on the Ritchey. I’ve been looking at the Swiss Cross and one of the things I was curious about was the ability to run the Clement X’plor in 40mm. I’ve heard conflicting reports as to whether they will fit or not and It looks like this proves they will fit although clearance looks a bit tight? I’m assuming the break away has the same clearance as the non break away Swiss Cross? Care to comment anymore on the tire clearance?
Michael, about 3mm clearance each side on the Breakaway with the Clement X’Plor in 40mm, but cannot speak for the Swiss Cross.
Quick question, did you have the frame customized after the fact to accommodate di2, if so who did you have do it?
Brent, I drilled it out myself. It performed flawlessly with no issues for over two years. In fact, we just got done drilling another steel Breakaway for our lady team member… she too is ruined by Di2!
You may be interested to know I’ll be posting details of my personal Ti Breakaway CX soon. I *thought* about drilling out the frame, but Ti is a very tough material and hard on drill bits. I am using a SRAM eTap groupset on this bike, which saves a lot of hassle!
Awesome article, and so glad I found it! I’m looking at building up a travel bike, and the steel breakaway seems like it will be a good option. The Ti version is awesome, but price-wise a little out of the ballpark. I have now been on disc brakes for several years and love them. I’m considering how I can convert the Breakaway to disc brakes, and I found a local bike builder who can braze on a disc brake tab inexpensively. I’m trying to source a disc brake carbon through-axle fork, but the stock fork seems to be a 1-1/8″ straight steerer tube, and most modern forks are a 1-1/8 to 1-1/4″ taper. Any ideas on the whether the head tube would accept a 1-1/4″ bottom bearing? Not much info on the Ritchey site for the specs.
Thanks Harris! Without a custom headtube, you’re out of luck for a 1 1/4″ bottom bearing. The headtube is designed for regular 1 1/8″ headset cups.
Honestly, you’ll be fine with a 1 1/8″ straight steerer tube. I upgraded to the Ti version recently – definitely pricey – but it is a very sweet and lighter ride. Good luck, definitely keep us posted if you customize your Breakaway. Would love to feature it on the site!
Also, check out my article on packing away a Breakaway, time lapse style… https://www.gravelcyclist.com/videos/video-disassembling-and-packing-a-ritchey-breakaway-gravel-bike-for-travel/
I appreciate this write-up — it may have saved me from selling my Breakaway in favor of a disc brake big tire bike! Question: I can’t find the American Classic rims you are running. What is the internal width? More generally, how wide must your rims be to run 40mm tires? (I mounted 35mm on old-school 15mm internal-width rims and it felt a bit squirrelly.) I’ve been looking for 29″ wheels to solve that problem, but those are hard to find in rim brake configurations any more.
Thanks!
Hi Max,
I use the American Classic Hurricane wheelset nowadays – https://amclassic.com/index.php/wheels/hurricane-tubeless.html
Or these American Classic rims built typically built onto Dura-Ace hubs – https://amclassic.com/index.php/rims/acrd-2218-road-tubeless-rim.html
Both rims measure 18mm internally. I run 40mm tyres on both options all of the time.
I recently upgraded to this – https://www.gravelcyclist.com/bicycle-tech/featured-bike-ritchey-breakway-ti-cx-gravel-travel-bike-with-sram-etap/
Thanks for this! That titanium version is lovely and I like the idea of e-Tap for a break-down bike. Too bad I am poor. Ride long and prosper.
Thanks Max!
Great article. I am looking at a Breakaway CX Frameset to build up as my go everywhere do everything travel bike. Have heard awful things about centreing Mini-V brakes, but you seem to love them. I have never used them, so how do they perform compared to say an Ult/DA standard road rim side-pull brake? I ask because I normally do some looooong alpine descents on my travel on a more aggressive road geometry bike, which leads me to any discernible difference with the cross geometry in the cornering on tarmac at speed?
Would love to have discs, but the hassle with travel is too hard – mechanical disc seems the only option, like on the Ritchey Carbon (hmmm?) Breakaway outback, but they are mechanical disc (mainly), and the cost for a frameset is getting pretty steep for my budget.
Thanks again for the write-up.